Important Notes Before You Start
- If you are using a custom domain, make sure that your custom domain is fully secured using HTTPS.
- The process for adding or changing group memberships works off of platform events. This process constantly analyzes the platform events in order to understand if there are users needing to be added or removed to/from groups, based on these events. As a result, any user modification that involves group modifications is processed asynchronously.
Use Case Scenarios
If your company wants to provide a dynamic and custom experience for its various types of users, as a Superadmin you need to identify specific user segments in the platform to target an audience for various Admin actions such as course enrollment, course catalogue visibility, page/menu visibility, reporting and notification delivery.
In order to identify specific user segments, you can configure several different user additional fields that capture important user attributes. These fields may include information such as Job Title, Hire Date, Department, Location, Manager, Product, Employee Status, or anything else that may be valuable to track within the platform.
With these attributes tracked for each user, you can set up groups with an automatic assignment to automate the process of identifying a user segment. You can set up broad-reaching groups that contain only one rule (for example The “Sales” group should contain anyone whose job title contains the word “Sales”), and also narrow groups with multiple rules (for example The “Los Angeles Sales Team New Hires” group should contain all users whose Location is Los Angeles, Job Title is Sales, and Hire Date is after x date). By creating multiple groups, you as a Superadmin can easily target various user segments for use in the platform.
Creating Groups
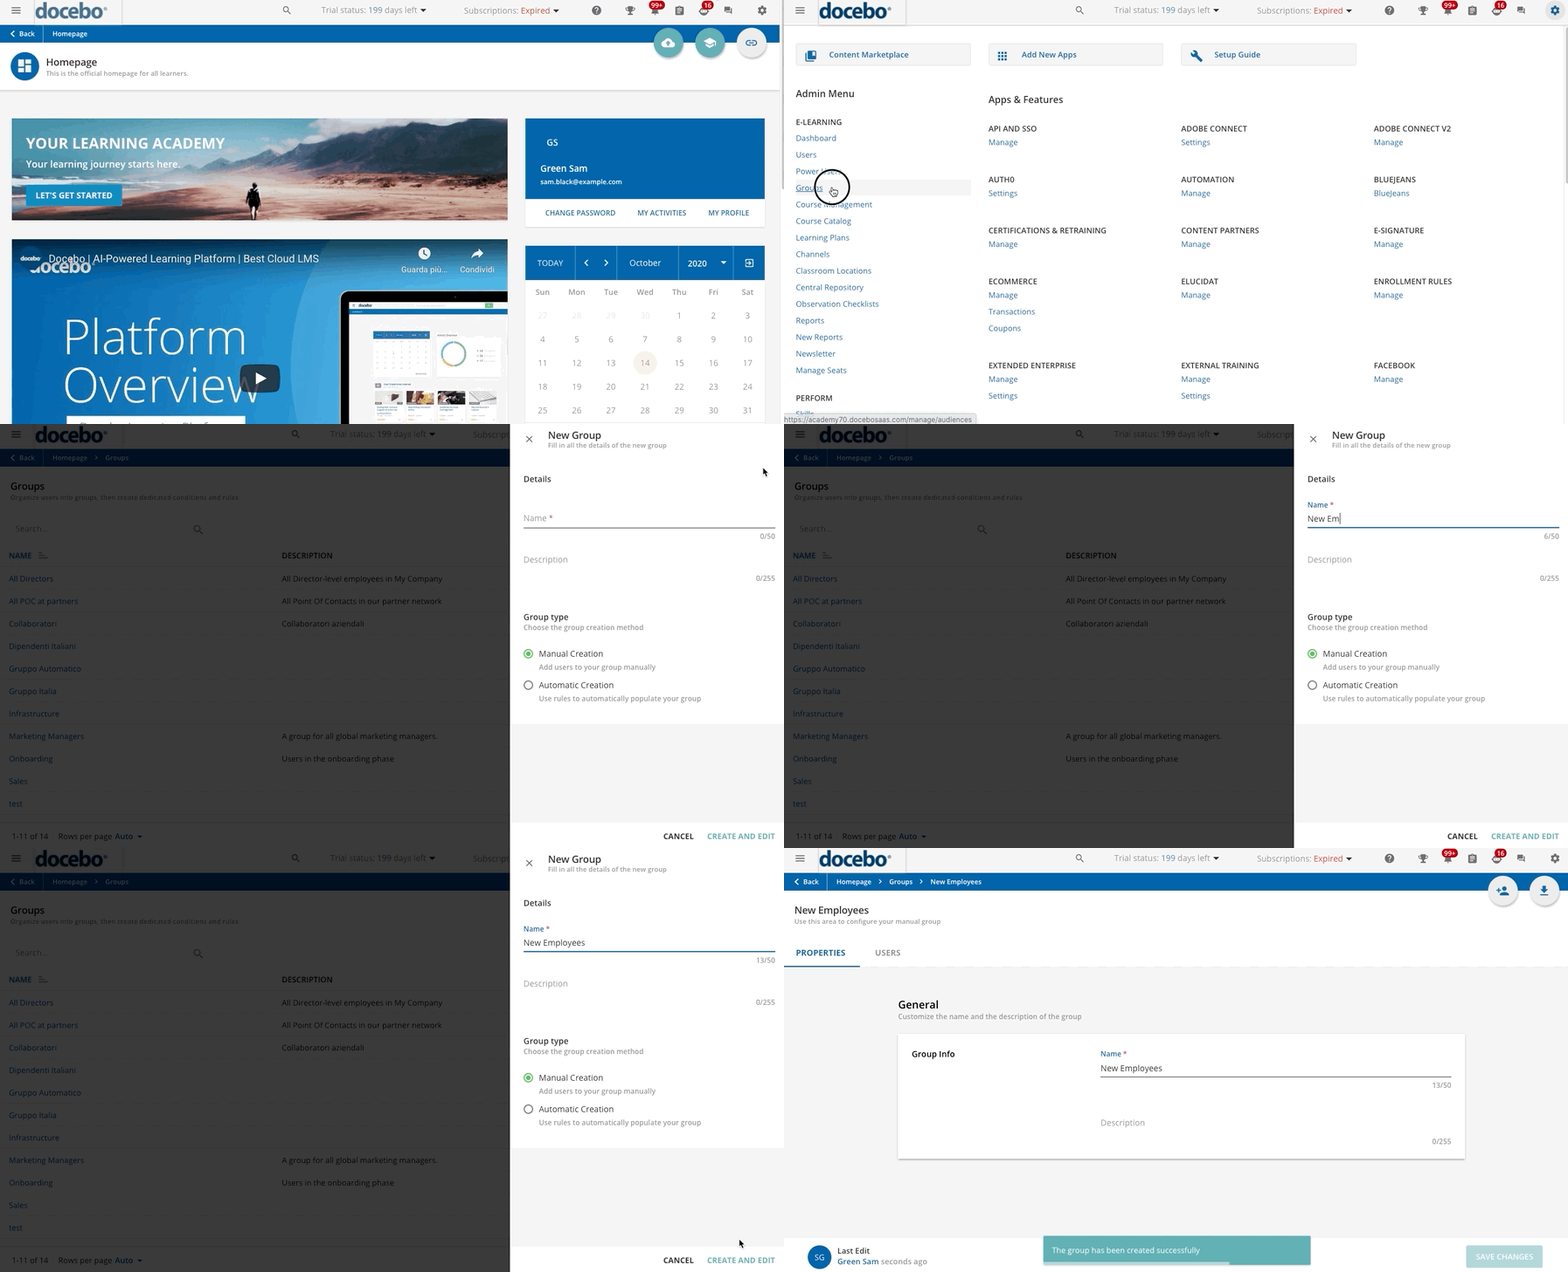
To create a new group, log into the platform as the Superadmin and access the Admin Menu from the gear icon in the top right corner of the platform. In the Admin Menu, press the Groups item in the E-Learning section.
On the main Groups page, press the plus button in the top right corner. In the New Group right panel, assign a name and, optionally, a description to the group. Then, choose the policy for the group’s population process (either manual or automatic) and press Create and Edit.
Was this article helpful?
That’s Great!
Thank you for your feedback
Sorry! We couldn't be helpful
Thank you for your feedback
Feedback sent
We appreciate your effort and will try to fix the article
