Introduction
Observation Checklists are an easy-to-use tool integrated into your learning platform, enabling you to observe and document how your learners and team members perform their tasks in a quick-to-configure checklist format. You as a Superadmin can easily create observation checklists in multiple formats (e.g. single choice, multiple choice, dropdown, and other response types) for users to complete for themselves or for other users in the platform or for managers to complete for their team members.
Furthermore, you can also add observation checklists as training material into a course, by importing into a course (of any course type) the checklists already created on the Observation Checklists management page. This article outlines how to import a checklist into a course as training material.
Remember that the same checklist can be both (and simultaneously) scheduled using the Observation Checklists management page and also be added as training material in a course from the Course Management, as explained in the following sections of this article.
Use Case Scenarios
The Observation Checklists feature opens various opportunities, such as:
- Monitoring and ensuring that users work in compliance with requirements or processes.
- Quickly checking on how users perform specific work tasks.
- Monitoring the status of user progress related to certain tasks inside or outside of the learning platform.
- Ensuring that your learners are following what they’ve learned beyond formal training.
By including observation checklists in your courses, you as a Superadmin will be able to fully monitor the learners’ progress via checklists completed by an observer that can also be another person and not the learner enrolled in the course and to tie it to the completion of a specific course.
Importing Observation Checklists as Training Material
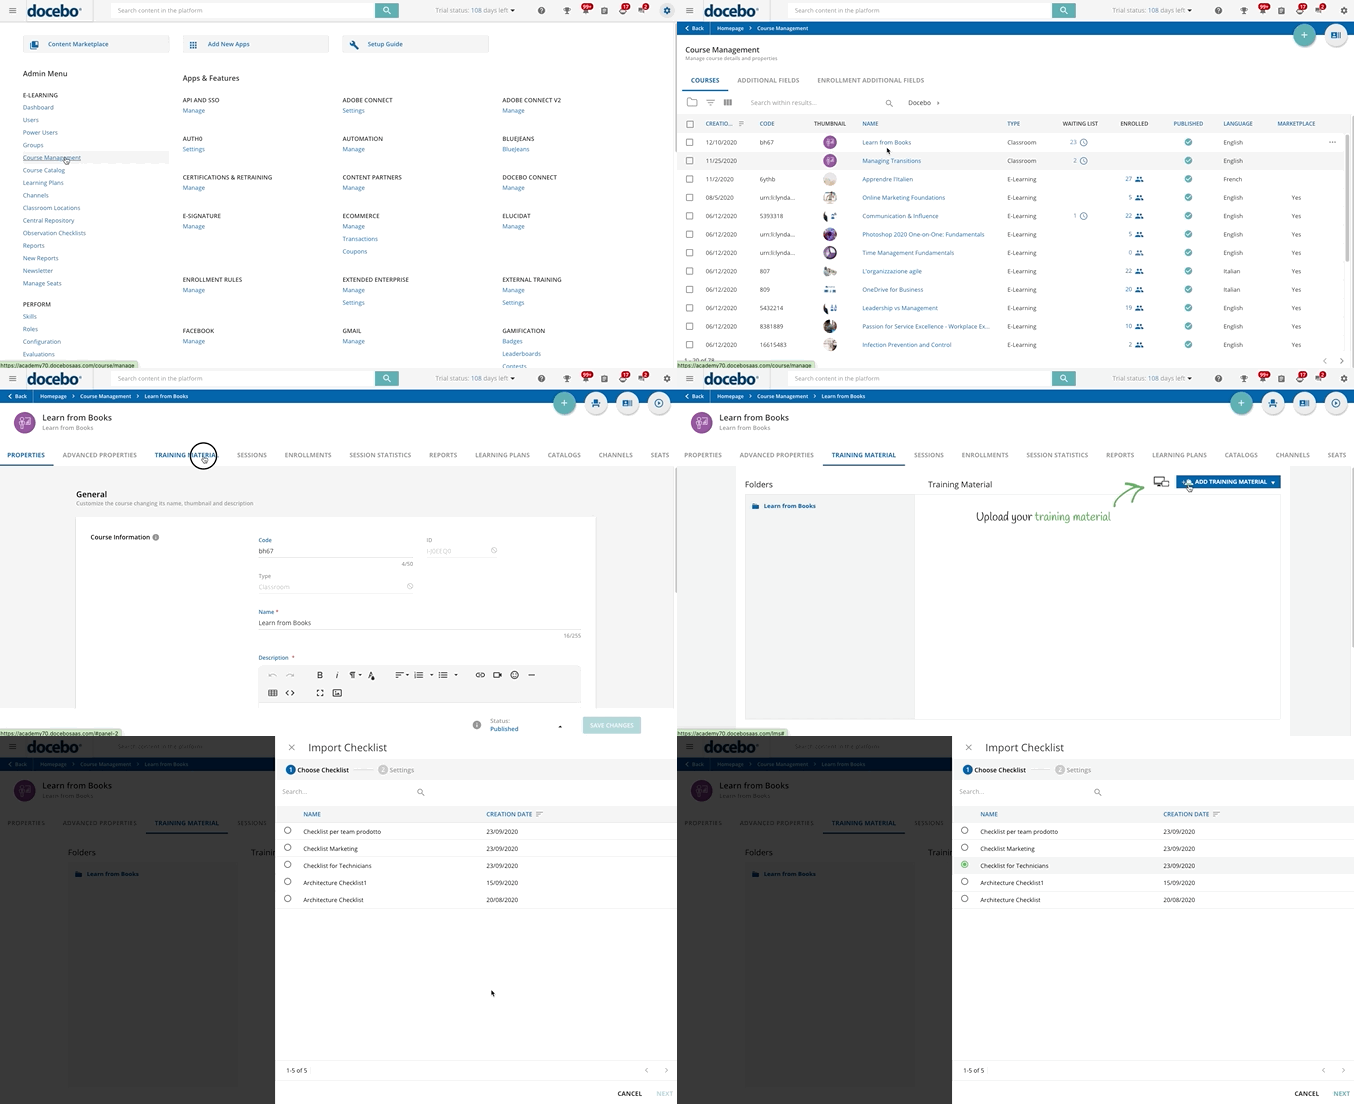
In order to add an observation checklist as training material for your course, log in to the platform as a Superadmin and access the Admin Menu from the gear icon in the top right corner of the platform. In the E-Learning section, select the Course Management item. Look for the course for which you would like to import the observation checklist as training material and click on its description, then move to the Training Material tab. From here, select the Add Training Material button, then select Observation Checklist from the dropdown menu.
You can import the checklists already created by you as a Superadmin or by a Power User using the Observation Checklists management page, but you cannot create new checklists from the Course Management page. If you want to create or manage your checklist, reach the Observation Checklists page from the Admin Menu.
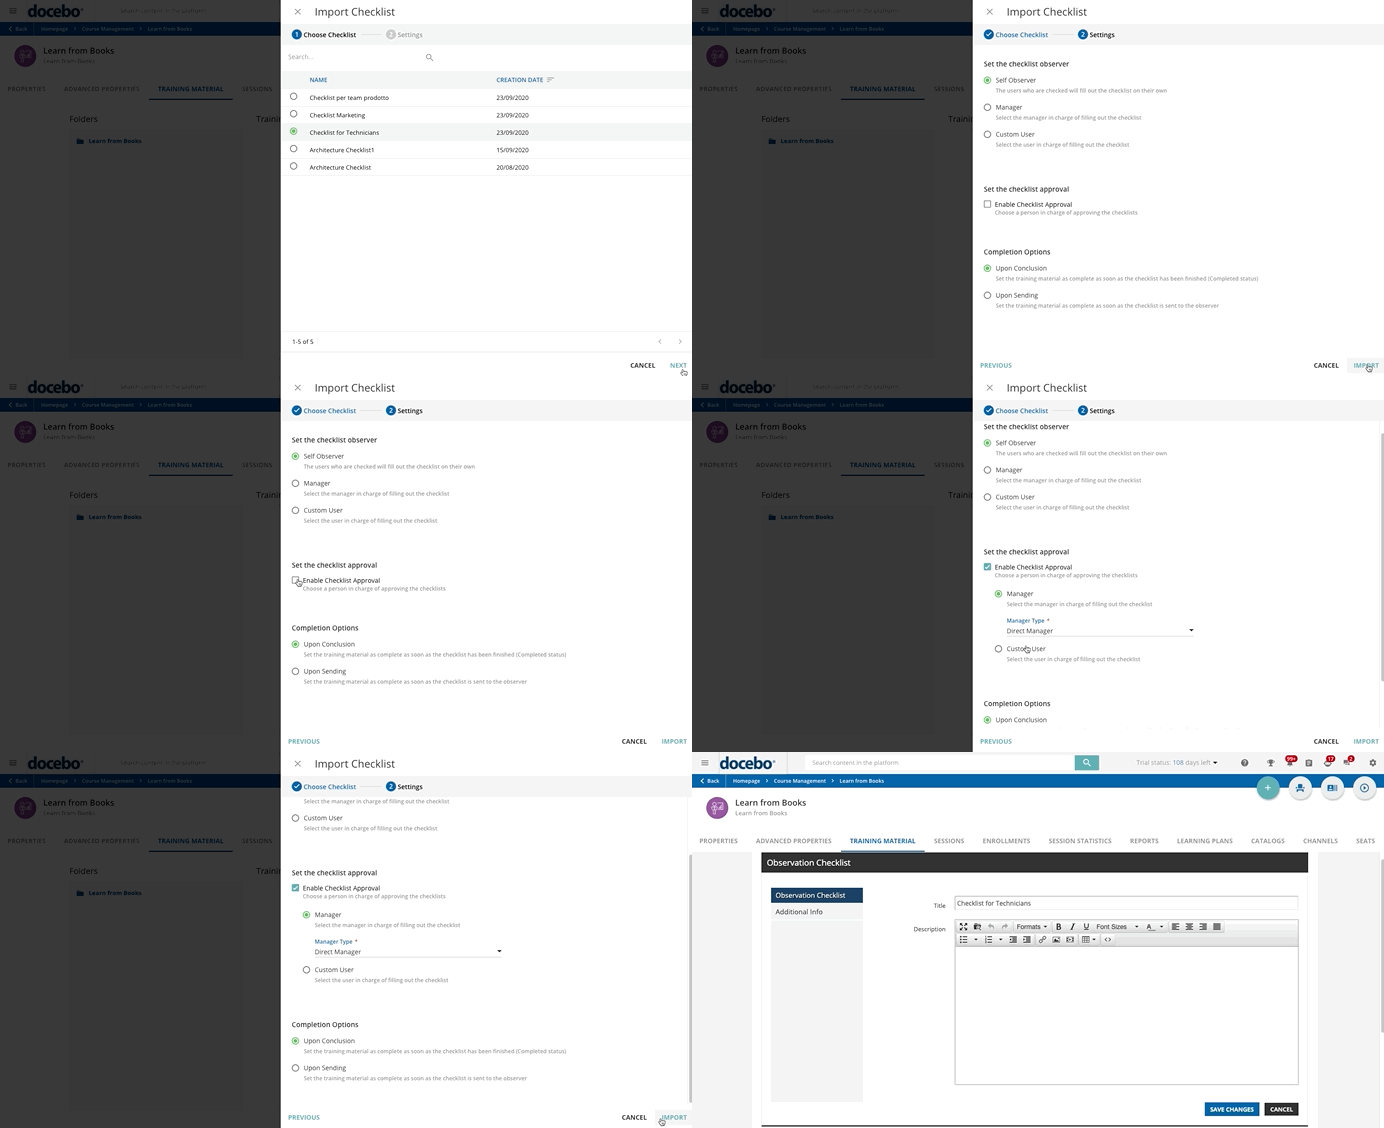
 The Import Checklist right panel will open. Start by choosing one of the available checklists (that are the ones created on the checklists management page), then press Next and set who will be the checklist observer (the person who will fill out the checklist), the checklist approval, and the completion options.
When configuring the checklist that you are importing as training material, you’ll go through the observer and the approval sections, that are the same as the ones you found in the second step - Observation and Approval - of the checklist configuration when scheduling your checklist on the Observation Checklists management page. For any further information on how to configure these two sections, please refer to the Second Step: Set the Checklist Observer and the Checklist Approval section of the checklists management article.
Also note that when importing a checklist, you won’t need to configure again which users will be checked (first step of the configuration on the Observation Checklists management page), because they are the learners enrolled in the course you are adding the checklist as training material.
Once configured the checklist observer and decided if the checklist needs to be approved by another person, set the completion options, that is the completion criteria of the checklist training material inside of the course.
If you choose the Upon Conclusion option, the checklist training material is marked as complete when the checklist reaches the Completed status (the observer has finished responding to the items in the checklist and pressed the Send Checklist button). Remember that, if the checklist requires the approval step, it will be considered Completed only after the approval has been done.
If you choose the Upon Sending option, the checklist training material is marked as complete when the checklist is sent to the observer to be filled out. Set this option if you want to allow the learner to continue with the course, especially when the observer is another person because the learner does not need to wait for the observer to complete the checklist to be able to continue with the course.
When you have finished configuring the completion options, press Import.
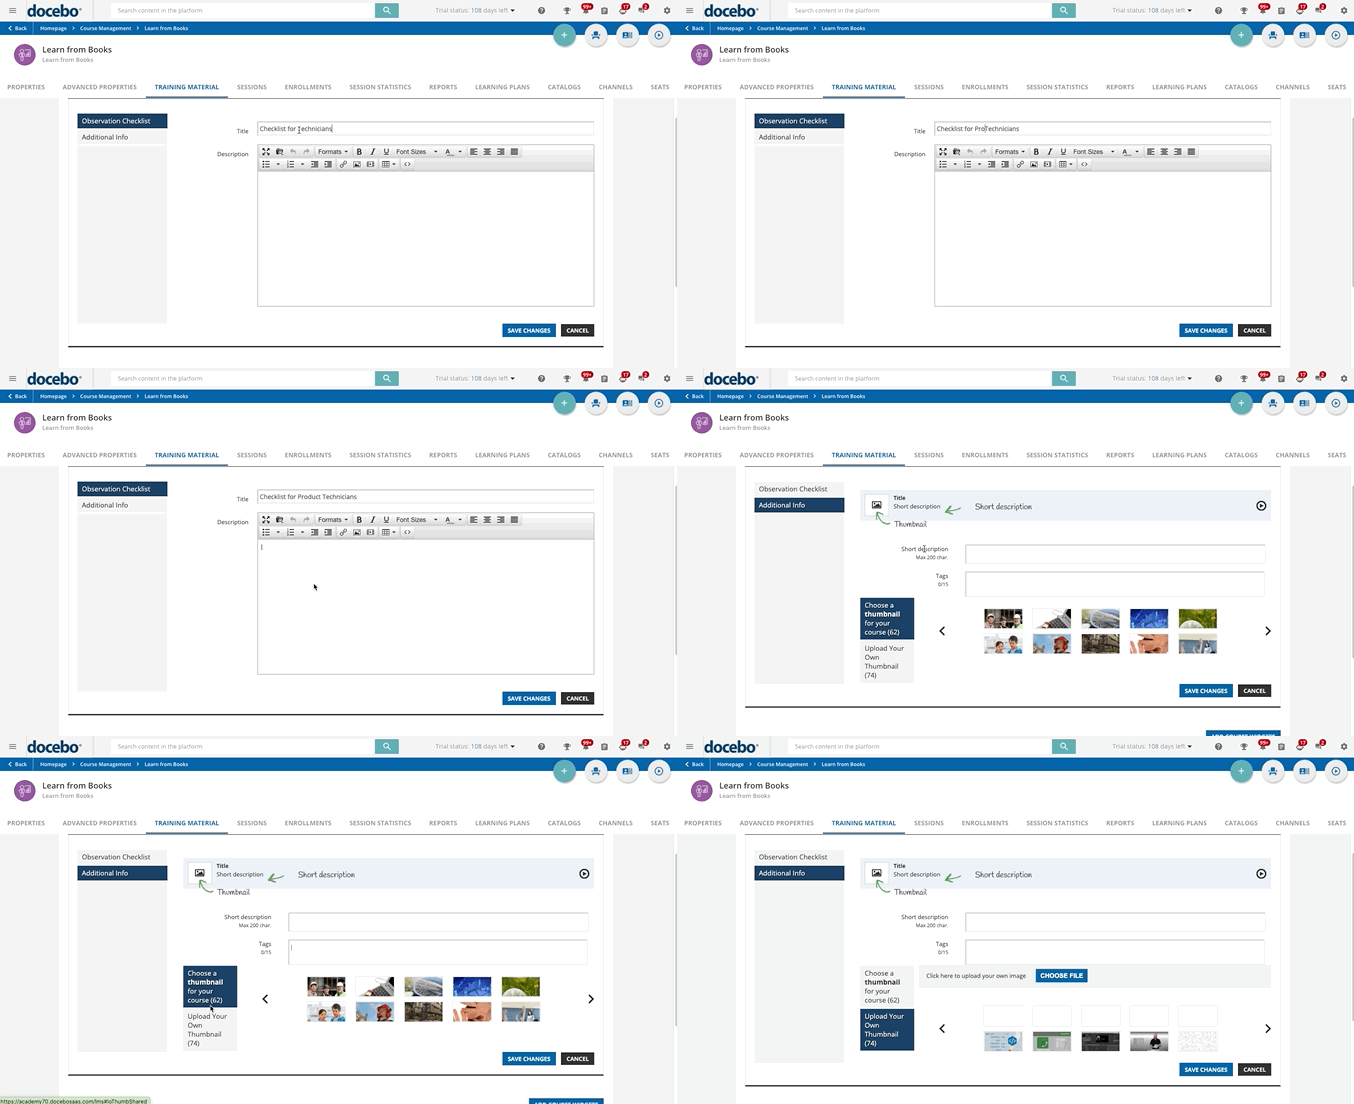
You can now change the checklist’s title by typing a new one in the corresponding field. In fact, the checklist training material title can be different from the title of the checklist itself. Below, you can also add a description of the checklist training material. Then, move to the Additional Info tab to add a short description, tags and a thumbnail.
Adding tags to your training material improves its searchability in your platform’s global search. Some tags may be automatically generated based on the content of your material, as understood by your platform using artificial intelligence (note that this only works for English, Spanish, French, German, Italian and Portuguese content). You can edit or remove tags at any time, with a limit of 15 tags per training material and of 32 characters per tag (find out more about taggable content types). Please note that, for security reasons, the platform artificial intelligence does not access private content (that is, content requiring authentication to be accessed) and can thus automatically generate tags only for public content. When uploading private content, we suggest you add tags manually.
Then, set a thumbnail. You can choose from a selection of pre-loaded thumbnails, or upload your own.
Once you have finished, press Save Changes to create the training material, which now appears in the list of training materials on the course’s Training Material tab. You can switch to learner view by using the Learner View button in the action bar at the top of the Training Material tab. In the learner view, you can see how your new training material appears to your users.
Was this article helpful?
That’s Great!
Thank you for your feedback
Sorry! We couldn't be helpful
Thank you for your feedback
Feedback sent
We appreciate your effort and will try to fix the article


