Adding Items to an Observation Checklist
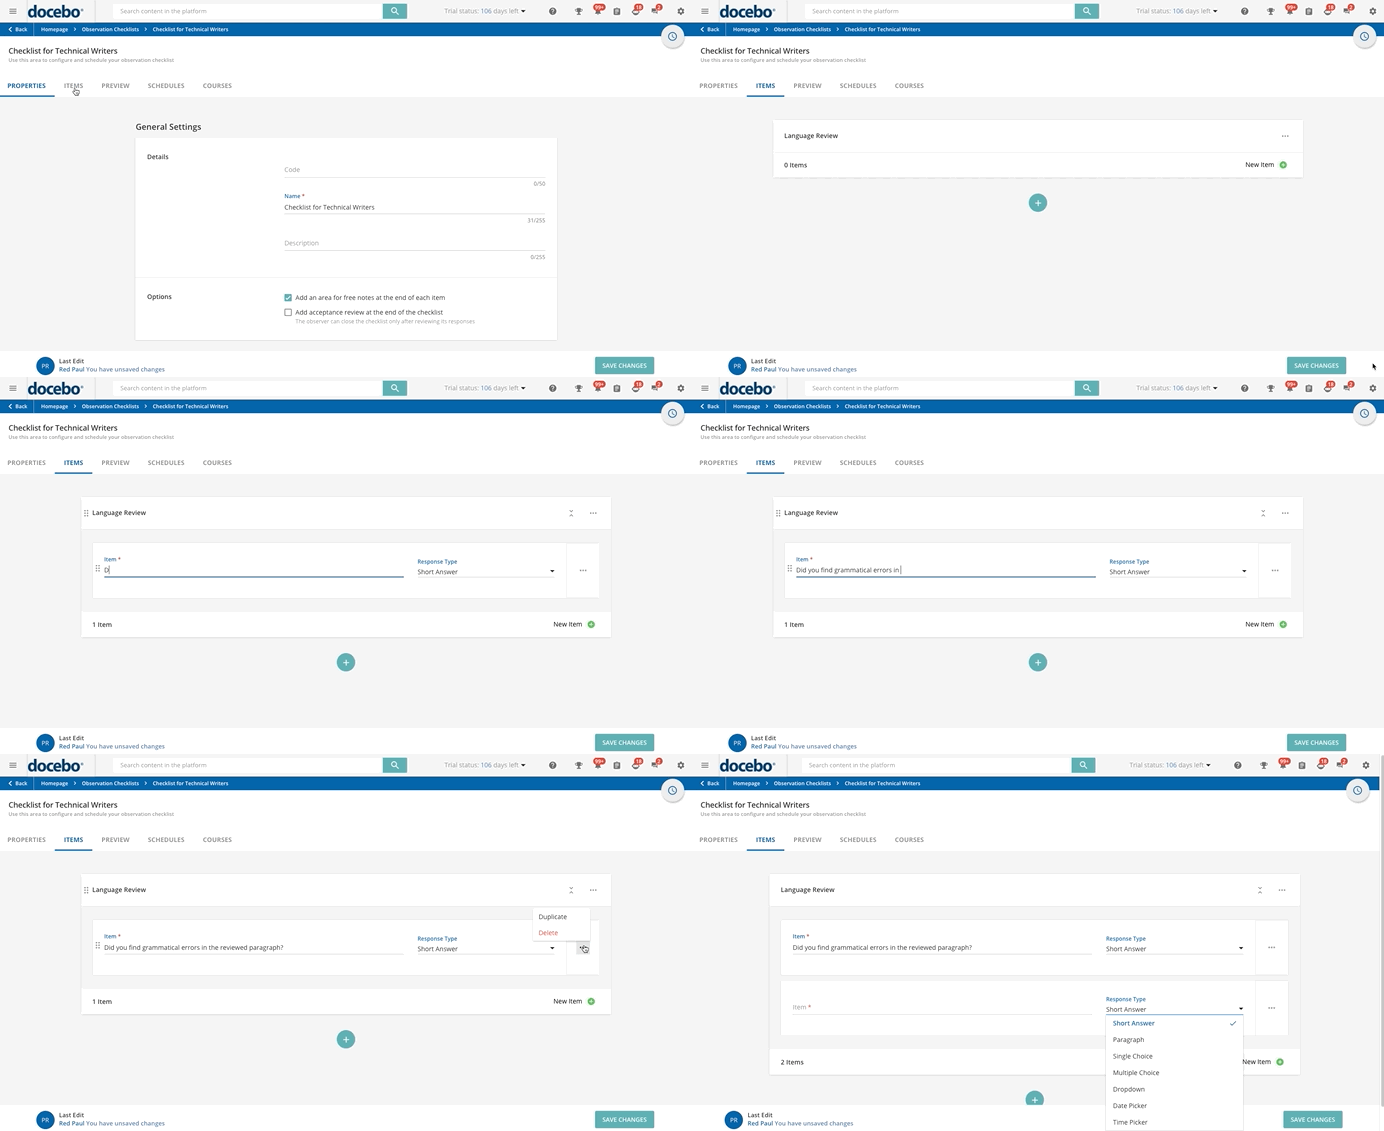
Reach the Items tab on your checklist’s page to add new groups of items and new items inside each of the groups you just created. Here, you will view the structure of your checklist. You can create groups of items if you want to gather them by theme, or subject, or if you need to group the items on your checklist depending on when each item is checked (for example, tasks to be performed before starting an activity, tasks to be performed during the activity, and tasks to be performed after having completed it).
Press the plus icon (new groups of items) to add a new group. A right panel will open, where you can configure the details of the newly created group of items. Fill in the Group Name (it is the only mandatory field) and the Description/Instructions text fields.
Then, if you don’t want to show the group name in the checklist, flag the corresponding option. Otherwise, the group name is shown by default. Please note that the group name is never shown on the mobile app, no matter how you configure the option mentioned above. When finished, select Create. Repeat this process to create new groups. Please note that there is no limit to the number of groups that you can create.
Now, press the plus icon (new item) to add a new item to the group you have created, then insert the name of the item in the Item field, and choose a response type (short answer, paragraph, single choice, multiple choice, dropdown, date picker, or time picker). According to the response type you have chosen, the corresponding response fields will appear below the item.
To edit, delete or duplicate a group of items or to delete or duplicate a single item inside of a group, click the ellipsis icon in the right part of the group section or of the item section, then select the corresponding option. You can organize the order of the items or the groups in your checklist by dragging and dropping them. To do so, hover your mouse over the item’s or the group’s row on the far left until the icon appears, then drag and drop the item or the group.
Please Note! If you edit your checklist’s groups of items after the start date you set for your checklist in the Schedule tab (meaning that your users or managers may have already completed that checklist), a new version of the checklist will be created. If your checklist is repeated every x days, weeks or months, the users and managers who complete it will display the new version the first time they fill out the checklist after your changes. On the Observation Checklist page, you’ll always view the last saved version. For more info about scheduling options, read the Scheduling and Selecting Users for a Checklist section.
Was this article helpful?
That’s Great!
Thank you for your feedback
Sorry! We couldn't be helpful
Thank you for your feedback
Feedback sent
We appreciate your effort and will try to fix the article
