Setting the Notification's Recipients (User Roles & Course Selection)
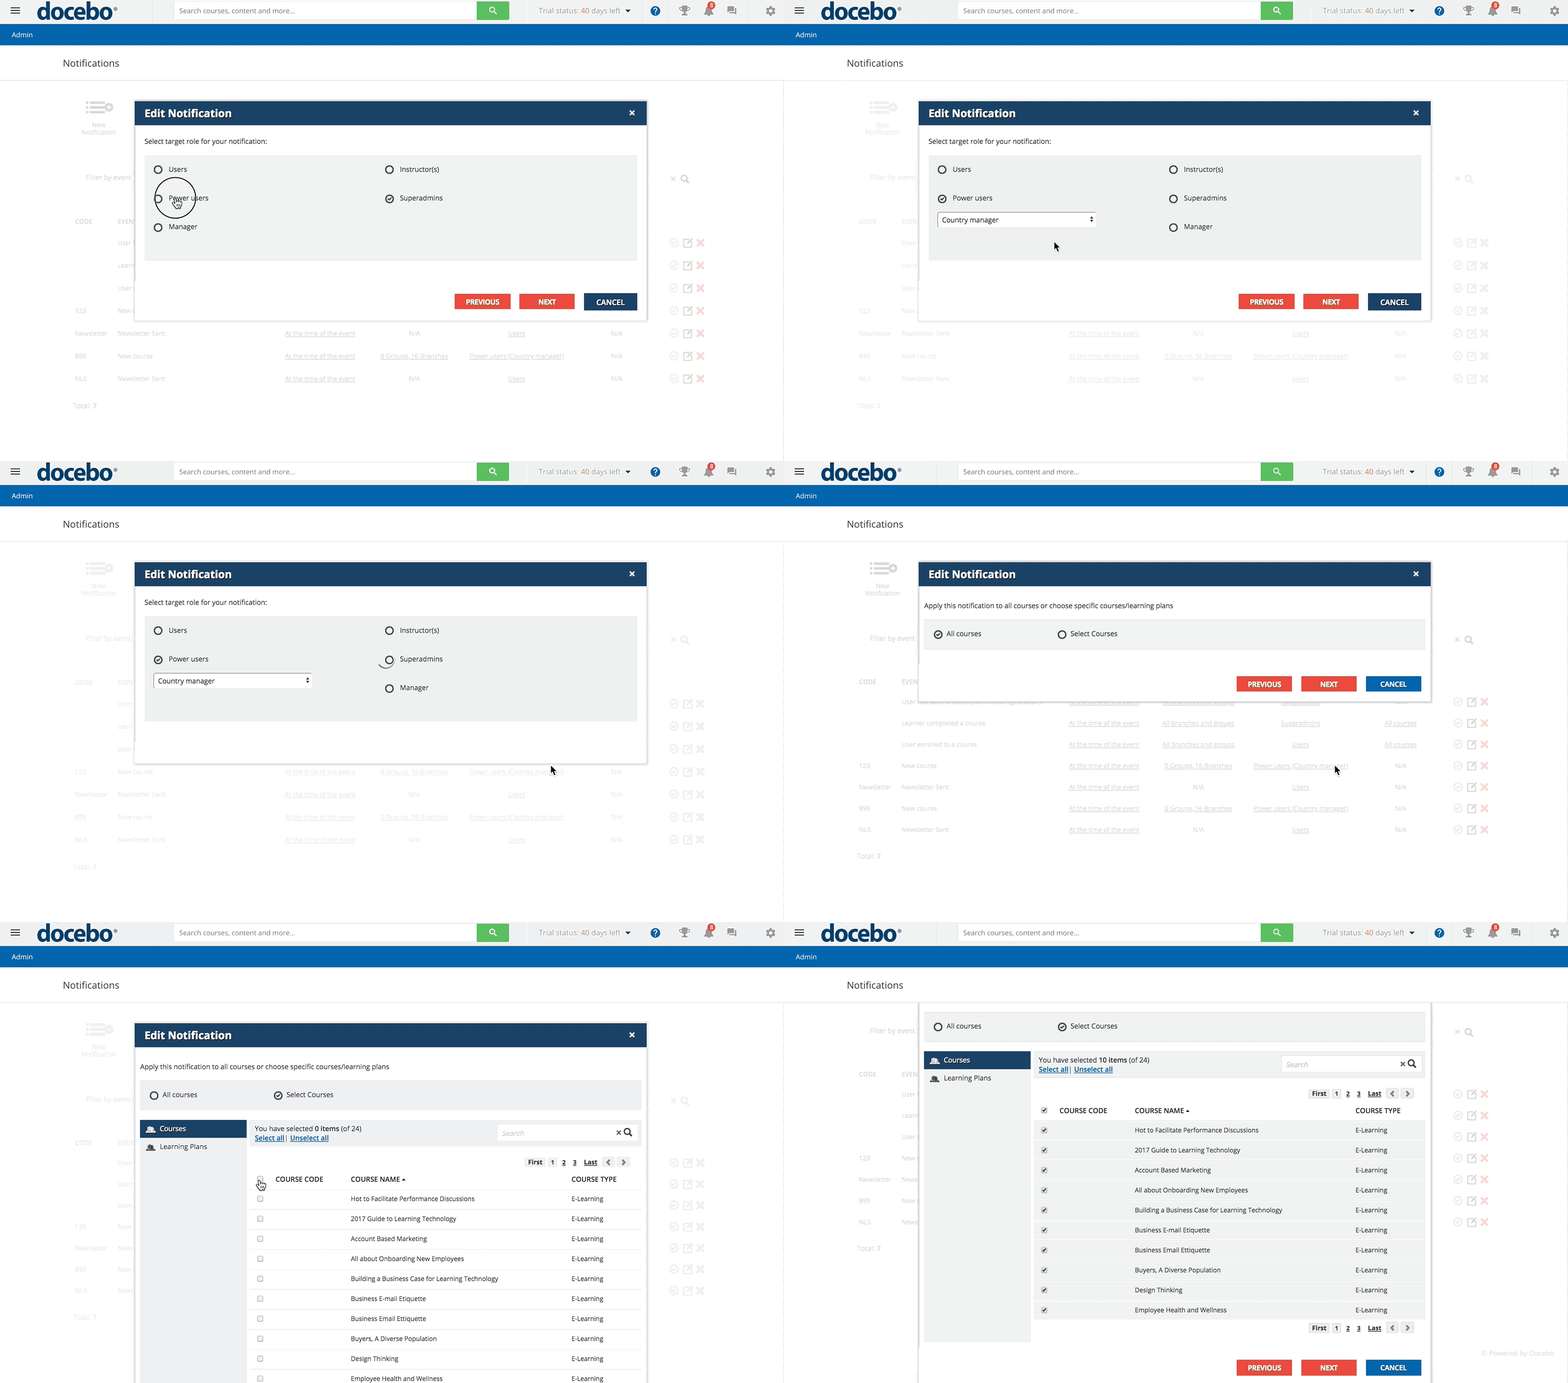
Now, select the target for this notification, that is, who will receive it: Users, Power Users, Superadmins, Instructors, or Managers. Remember to carefully operate this choice, paying attention to the roles you have defined in your platform.
Not all of the roles are available for every notification. The selected role defines the users receiving the notification as they relate to the users who either triggered the notification or who directly relate to the triggering event:
| Selected Target | Description |
| Users | The user who triggered the notification will receive it |
Power Users | All Power Users who are assigned the selected profile and who have assigned visibility of the user who triggered the notification will receive the notification |
Managers | All of the users set as managers for the user who triggered the notification will receive it |
Instructors | The notification will be sent to all of the instructors assigned to the course selected in the notification |
Superadmins | All the Superadmins defined in the platform will receive the notification |
Remember that you can select one target recipient per notification: if you need to send the same notification to Power Users and to Superadmins, you have to compose two notifications, one for each recipient type.
When doing so, remember that roles may overlap with levels, so if you set up a notification for users and a notification for instructors, some instructors may receive both notifications, since they have been assigned to one or more courses as instructors, but their user level in the platform may be the user.
When configuring the notification’s recipients, remember that every notification behaves according to its own logic and may be subject to specific rules. Check Notification Events and Conditions for more information.
Select the notification recipients and press Next to select the courses you want to assign to the notification if any. Use the All courses option to associate the notification to all of the platform courses or the option of the Select course to operate on a selection of courses (or on a single course). Press Next to complete the creation procedure.
Now, you can Save and Activate the notification, or simply Save it and go back to the list without activating it. You can also go back to edit the details that you previously configured, or you can cancel the notification.
Was this article helpful?
That’s Great!
Thank you for your feedback
Sorry! We couldn't be helpful
Thank you for your feedback
Feedback sent
We appreciate your effort and will try to fix the article
