Adding Video Tooltips
Tooltips are short overlay messages (up to 100 characters) that you, as an expert, can add to screen recordings or videos to provide learners with extra information on the content or to stimulate users’ attention.
You can add tooltips to the video you upload, and to any video uploaded by any user in the channels that you manage, but note that you cannot add tooltips when you upload a link to a video (a link to a video from YouTube for example).
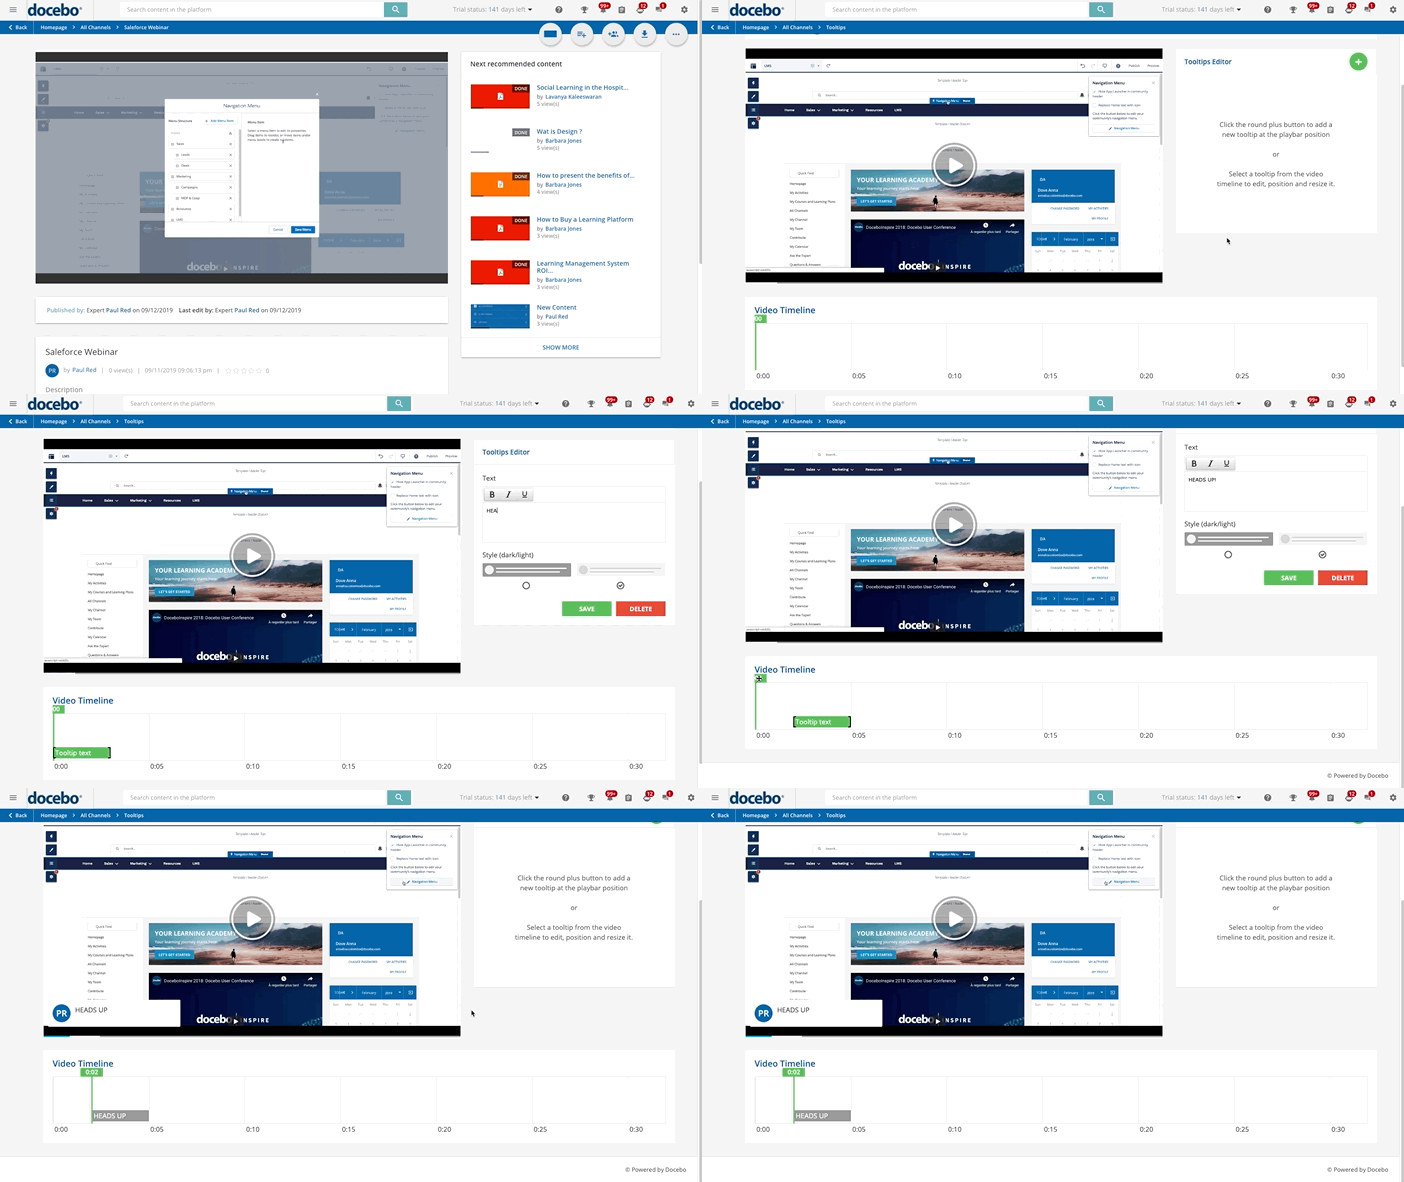
In order to add tooltips to a video, once it is uploaded to the channel, enter the video page, click on the ellipsis button in the top right corner, and then select Video Tooltip. The tooltip editor page shows the video in the upper area and the video timeline in the lower part of the page.
Click the plus button in the tooltip editor area to add a new tooltip in the video timeline. Place it in the correct position, and make it last as long as you need by extending the tooltip length in the timeline. You can choose between a dark or light style for better visibility according to your content. Add your text, then press Save.
The tooltip will be displayed at the playback position. You can add more than one tooltip for the same timing, in this case, a new layer will be added to the timeline. You can select a tooltip from the video timeline to edit, position and duration in time.
The minimum duration is 3 seconds without any limitation in max length. To remove a tooltip, click on Delete. To edit a tooltip, select the tooltip and proceed with the changes, then press Save to confirm. Click Back to View Mode to go back to your video.
Was this article helpful?
That’s Great!
Thank you for your feedback
Sorry! We couldn't be helpful
Thank you for your feedback
Feedback sent
We appreciate your effort and will try to fix the article
