Creating and Managing Sets of Skills
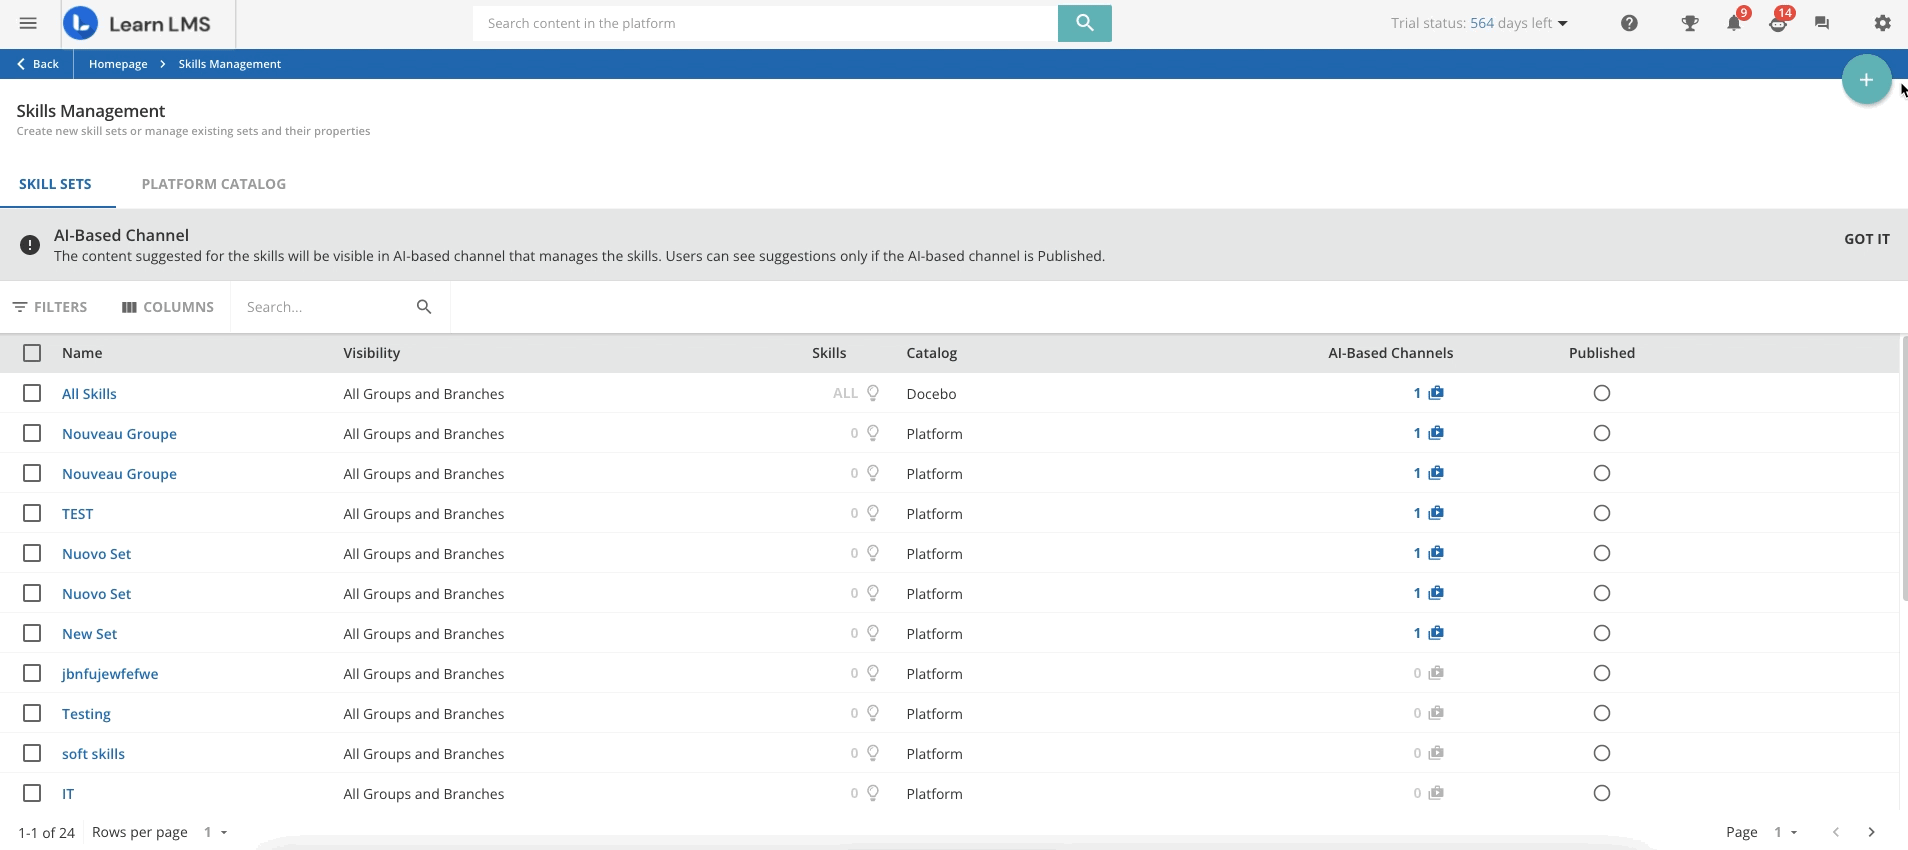
The Skill Sets tab lists all of the sets of skills already configured in your platform.
The All Skills set is available by default in your platform and collects all of the skills from the Docebo Catalog. You cannot edit its content, but you can manage its details and its visibility as described later in this chapter.
Similarly, more than one set of skills may be available in your platform, depending on your industry. You can manage these sets as any other set of skills you have manually created.
To create a new set, click on the Plus button in the top right corner and then on Create New Skill Set. In the right panel, enter a name for your set and press Create and Edit to access the set configuration area.
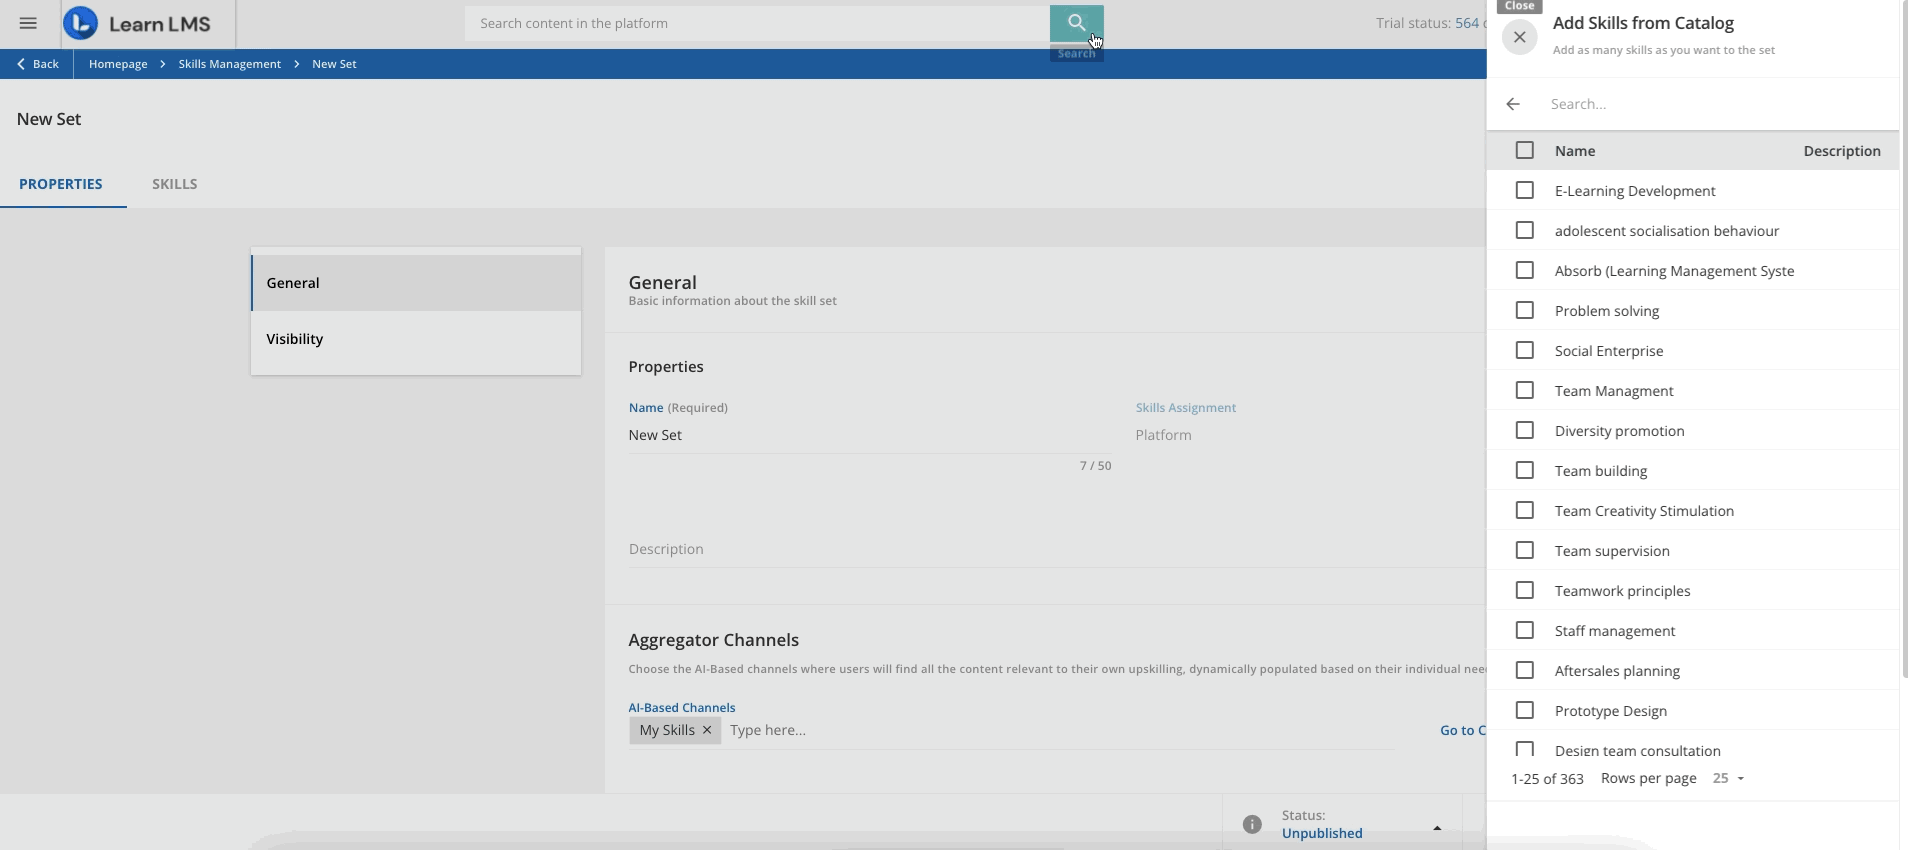
The set configuration area is divided into two tabs: Properties and Skills.
The Properties tab is divided into two sections: General and Visibility. Use the General tab to manage the set name and description. The Skill Assignment field is not editable and it is always set to Skills Selection when a set of skills is manually created.
The Aggregator Channels area displays the channel where the platform will constantly load the content needed to upskill your users.
Here you can assign AI-Based channels to the selected skill set: to do this click the Assign AI-Based channel button the channels you want to assign from the right panel, then click Assign.
Remember that it is also possible to assign different skill sets to an AI-Based channel from the Channel Management page when creating and editing a channel.
Move to the Visibility tab to set whether the skill set will be available to all users included in groups and branches, or only for the users of selected groups and/or branches. It is not possible to assign a set of skills to a single user.
Only the users included in groups and/or branches can take advantage of this feature.
The Skills area lists the skills associated with the set. From here, you can assign or unassign skills to the set. In order to add skills to the set, choose them from the Platform Catalog, click the Plus icon and then on the Add Skills from Platform Catalog button in the top right corner. You can search for specific skills. Select the skills you want to add to the set by flagging the checkboxes next to the skill names and clicking on Confirm to finalize the operation.
You can also create a new skill to associate with the set or pick one from the Docebo Skills. To do so, after clicking on the Plus icon, select Create New Skill. Please see the previous chapter to learn more about creating new skills.
The skills assigned to a set are listed in the Skills tab. In order to unassign a skill from a set, click on the barred folder icon at the end of the skill row. When you unassign a skill from a skill set, the users who have assigned themselves that skill will lose all of the content related to that skill.
You can unassign more skills from a set at the same time selecting them by checking the checkboxes next to their name, then clicking on Choose Action in the bottom right corner of the page and selecting Unassign from Skill Set.
Please note: If you unassign a skill from a skill set, the users who selected that skill will continue to have it associated with their profile.
The Users and Content counters show respectively the number of users who have assigned themselves the skill and the number of pieces of content (both formal courses and assets) assigned to the skill.
When ready, click on Save Changes to confirm the changes you have operated to the skill set. When a set of skills is created, it is listed on the Skills Management page, and its status is Unpublished, meaning that it will not be available for the platform users. Remember to change the status to Published in the publishing bar to make it available on your platform.
At any time, you can edit or delete the set of skills by clicking on the ellipsis menu at the end of the set row and selecting the corresponding option.
Was this article helpful?
That’s Great!
Thank you for your feedback
Sorry! We couldn't be helpful
Thank you for your feedback
Feedback sent
We appreciate your effort and will try to fix the article