User Statuses at Platform Level
User statuses determine which users have access to the platform and which users do not. Superadmins can manage the statuses of users by activating or deactivating them via the User Management section of the platform. There are four possible statuses for platform users:
- Active. These are users that are activated in the platform and have accessed at least one course or training material, or at least one informal learning asset from the Discover, Coach & Share module. They are marked with a green checkmark in their rows in the main users' list.
- Activated. These are users that have access to the platform but have not accessed any courses or training materials. They are marked with a green checkmark in their rows in the main users' list.
- Deactivated. These are users who no longer have access to the platform. If they try to access the platform, they will receive an error message on the login page and will need to contact the Superadmin. Deactivated users are manually deactivated by the Superadmin, and the deactivation is done immediately unless the Superadmin chooses to expire the user. They are marked with a grey checkmark in their rows in the main users' list. Even if the user is deactivated, the user's data is not erased by the platform.
- Expired. These are users who no longer have access to the platform because the Superadmin set a specific expiration date for their activated user status, and that date has been reached. If they try to access the platform, they will receive an error message on the login page and will need to contact the Superadmin. Even if users are expired, their data is not erased from the platform. They are marked with a warning icon in their Status column, preventing the Superadmin (or a Power User with granted permissions) to change their status. You can set back the previous status (either Activated or Deactivated) of expired users only by editing their profiles and updating their Expiration Date to a future date. Please note that this operation does not automatically activate the user's status, it is a reset to the previous state.
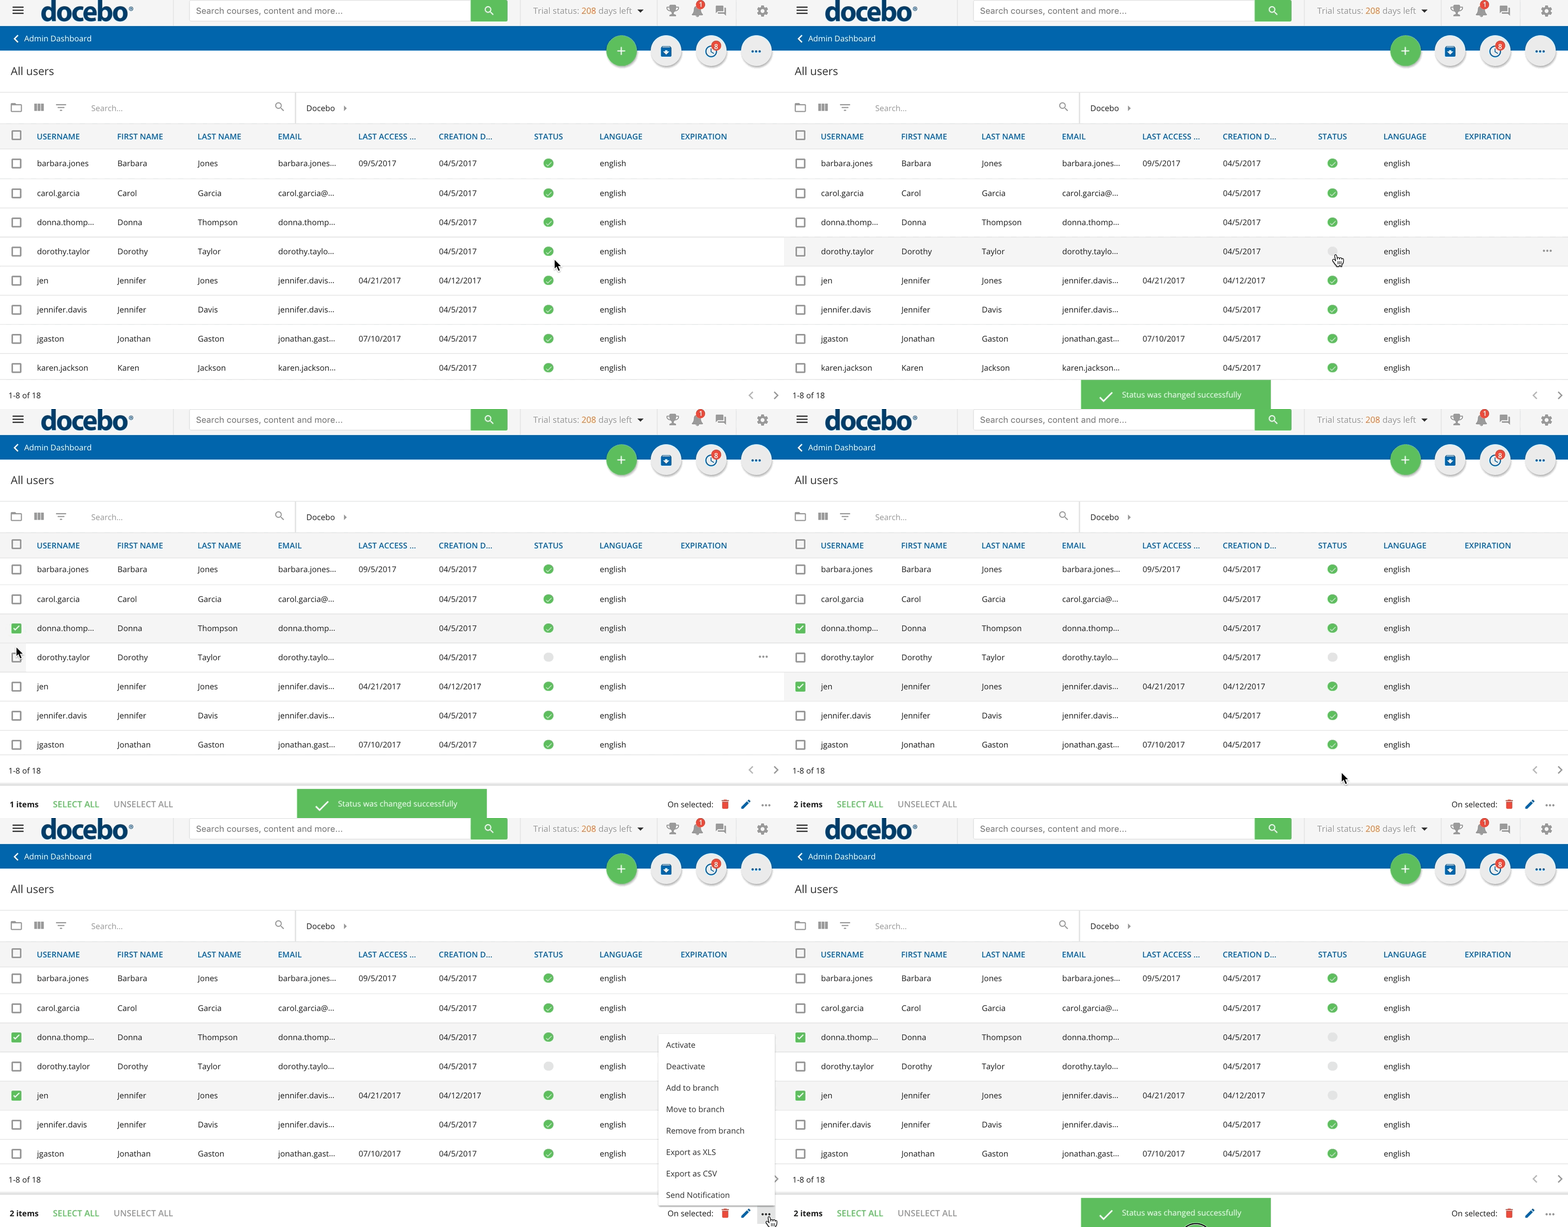
To view or change a user status in the platform, access the Admin Menu by scrolling your mouse over the gear icon in the header. Then, in the E-Learning section, press the Users item to redirect to the User Management page. On the main Users page, find a user in the list, then find the checkmark in the user's row. If the checkmark is green, then the user is activated. If the checkmark is grey, then the user is deactivated. You can press the checkmark, switching it from green to grey, to deactivate a user, and vice-versa.
As the Superadmin, there are two ways to activate and deactivate multiple users at one time. The first way to do so is by flagging the checkboxes in the user rows for the users that you want to activate or deactivate, then selecting Activate or Deactivate from the ellipsis icon menu at the bottom of the page. You can also massively activate or deactivate users via CSV, refer to the article Importing and Managing Users via CSV Files to learn how to do so.
Please note that it is not possible to change the status of the user currently logged into the platform.
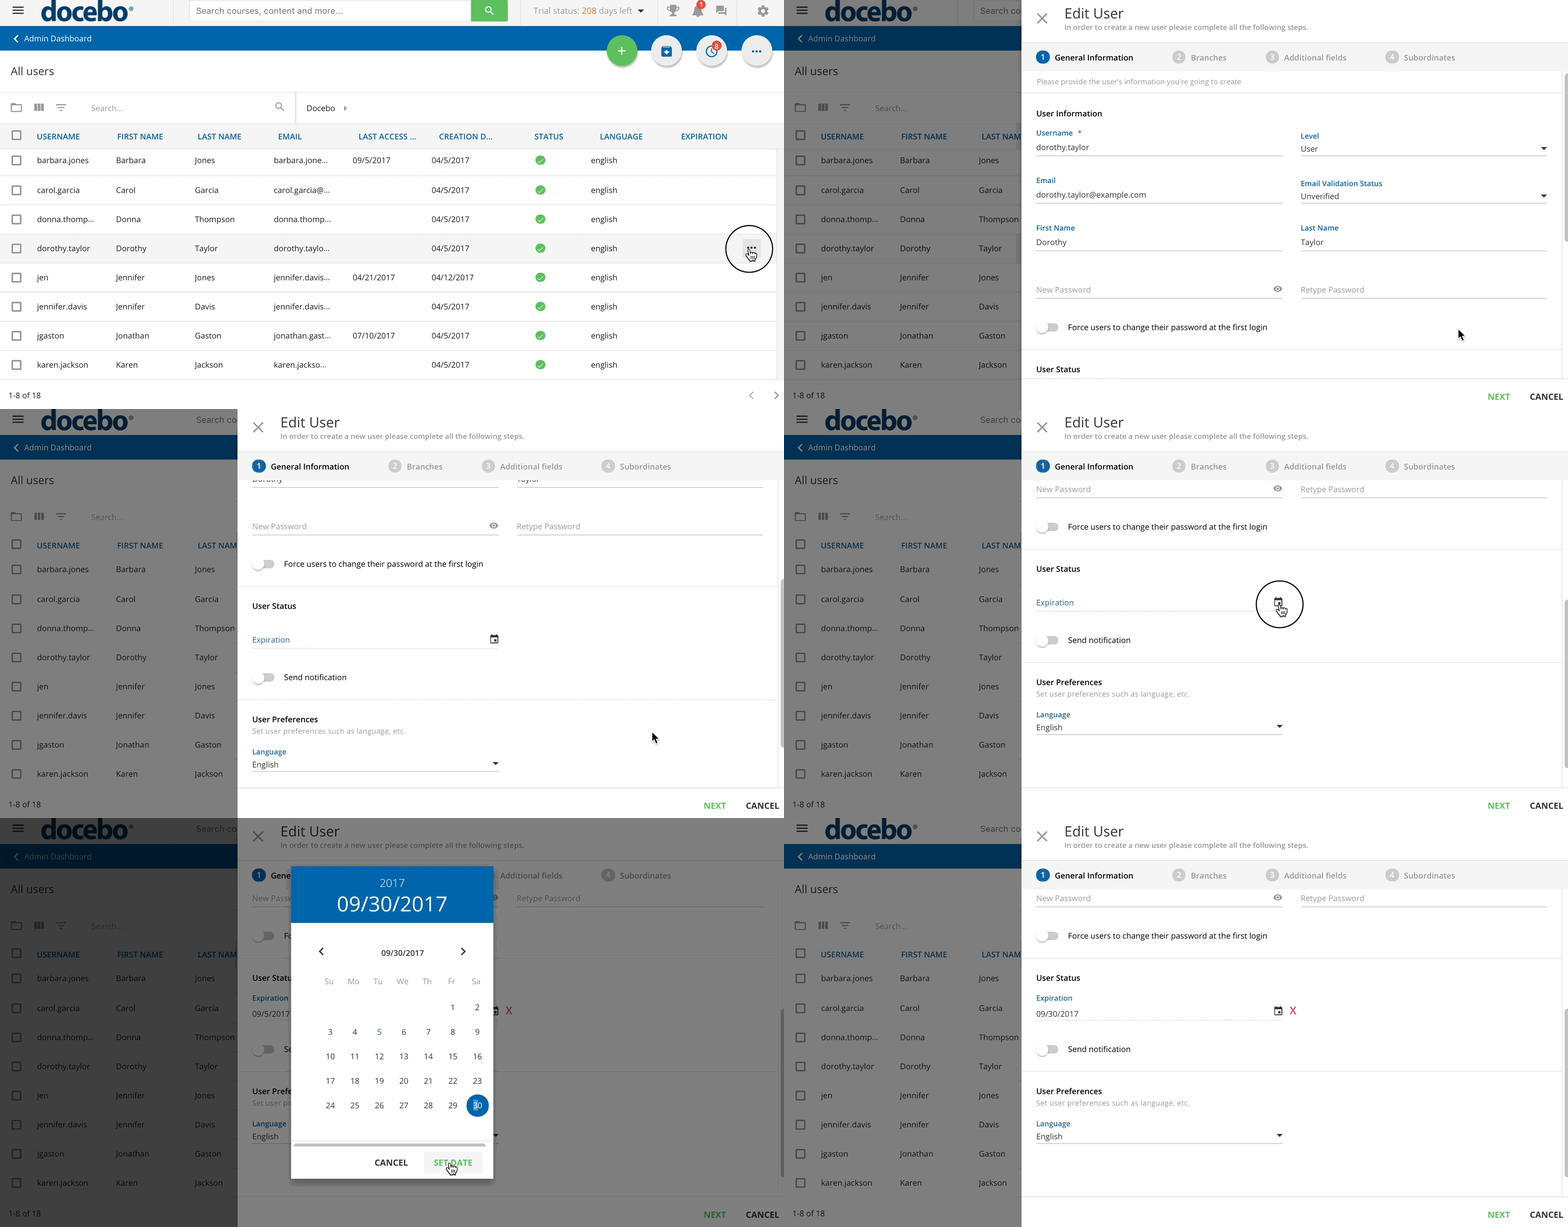
You can also set the expiration date of a user, so they will become a deactivated user after a certain date. To set the expiration date, press the menu icon in the user's row in the user list, then select the Edit item from the dropdown menu. In the edit menu for the user, find the Expiration field, then click on the calendar icon to select the expiration date from the calendar. Press Confirm at the bottom of the menu when finished.
Was this article helpful?
That’s Great!
Thank you for your feedback
Sorry! We couldn't be helpful
Thank you for your feedback
Feedback sent
We appreciate your effort and will try to fix the article

