Creating and Managing Session Events
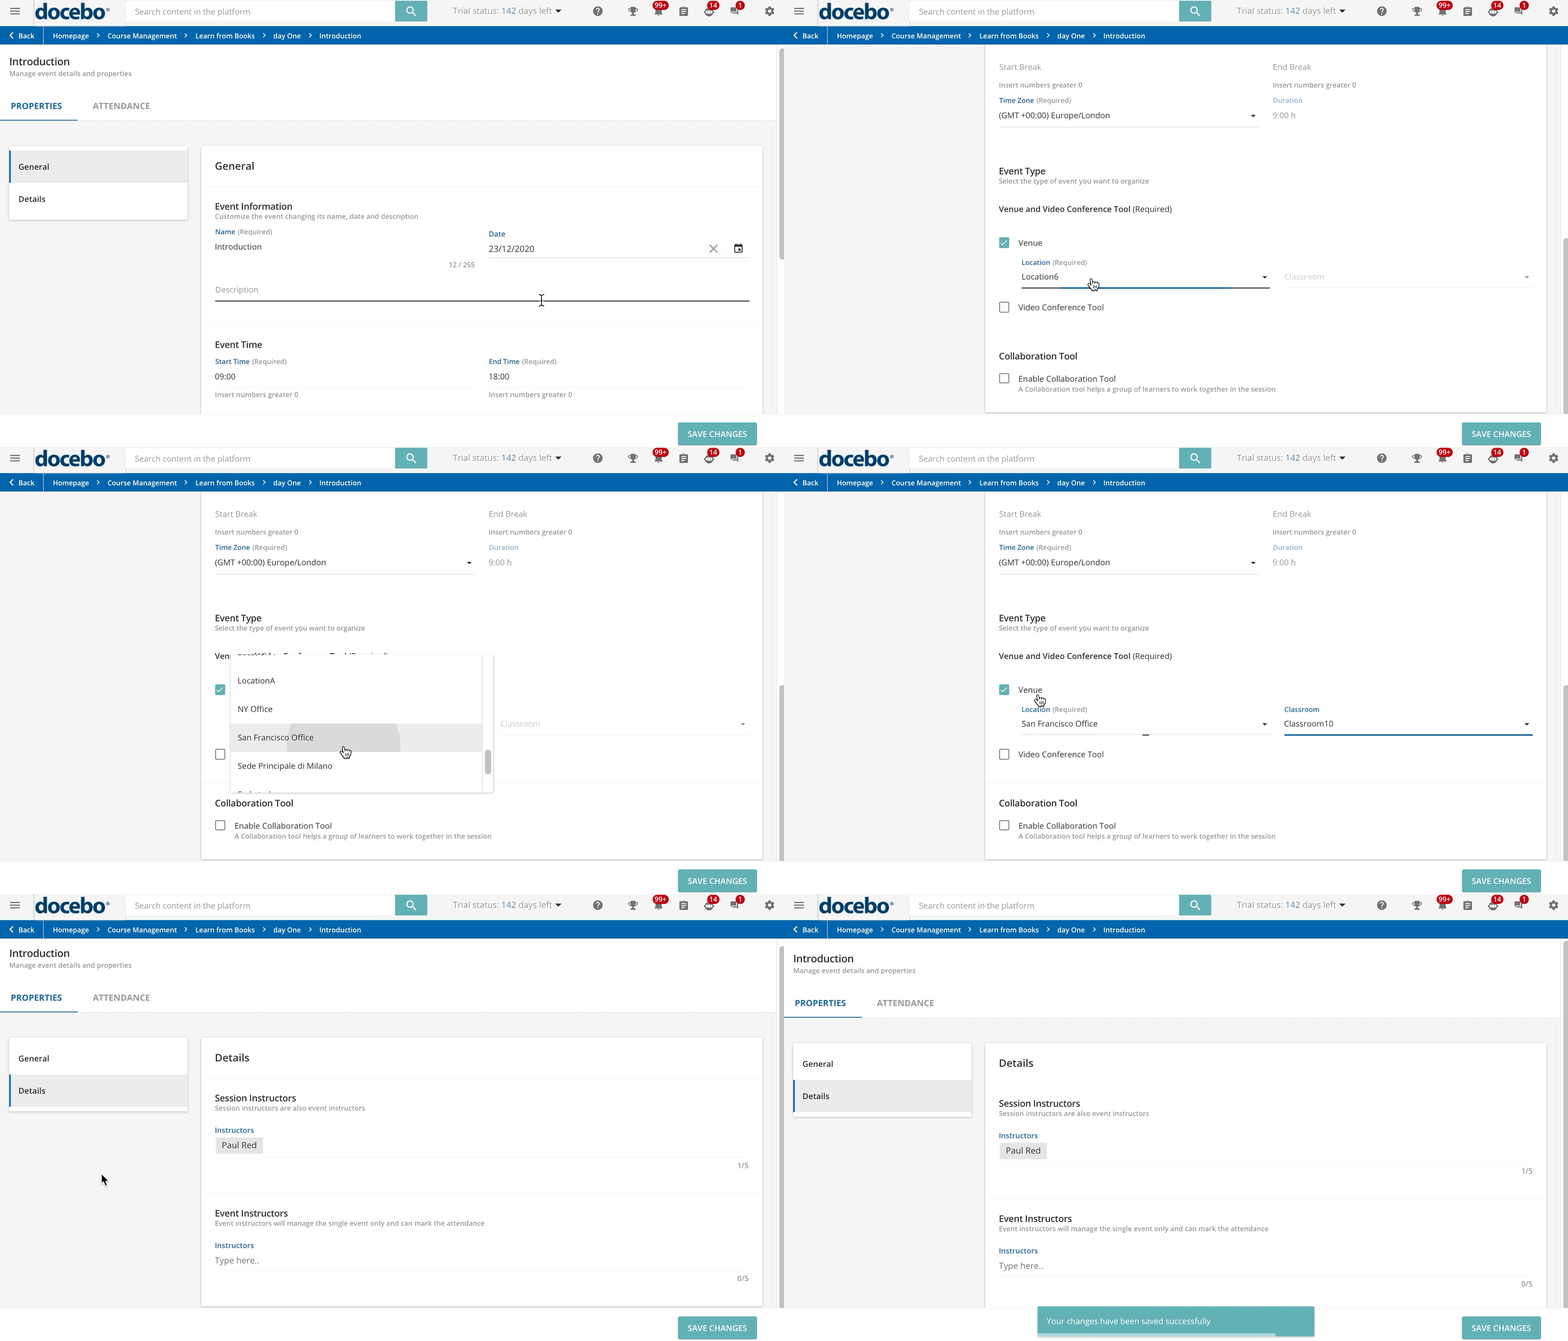
Move to the Events & Attendance tab to create a session event. Click on the plus button in the top right corner of the page, and select NewEvent. In the right panel, set the event name, date, description, and time. Make sure that you select the proper event time zone so that it will be converted according to the learner time zone when enrollment notifications are sent to learners.
Optionally, you can set a break time. When setting the break time, the platform will calculate the effective time that learners spend in the event by deducting the break time from the event total time.
In the Event Type area set whether the event is:
Event Type | Instructions |
Classroom (ILT) | Check the Venue checkbox and select a location and a classroom for it. If the number of venues is lower than 40, they are all listed in the dropdown and available for selection. If the number of venues exceeds 40, look for it by typing its name and selecting it among the proposed results. |
Webinar (VILT) | Check the Video Conference Tool checkbox. In order to set up the webinar, configure the webinar tool and the account used to host the webinar (some webinar tools may also require a password). If you are not using a supported webinar tool, select the Custom Tool option and enter the webinar URL. This URL is the web page that opens when learners click Join to access the webinar. If you are using a custom tool, you are able to launch the webinar as an xAPI/TinCan object. This requires development on your side, outside of the platform. At any time, you can change the webinar tool or the account within the tool used for the event. Configure if the VILT event will be marked as attended for learners as they join the webinar, or if they watch the webinar recordings. Finally, you can configure the Join Button Options for learners and instructors (when configuring this option, remember that tutors are considered instructors). |
Both Classroom and Webinar | Check both the Venue and the Video Conference Tool checkboxes. Having both options enabled allows you to manage those situations where part of the learners are attending the event on-site and part of them are online. |
At any time, you can switch the event type from classroom (Venue option) to webinar (Video Conference Tool option) and vice versa, as well as enable or disable one of the options. Make sure your users are informed about the switch, if the Notifications app is active in your platform, you can reach learners with a notification.
Optionally, enable the Collaboration Tool option to make the link to an external tool (such as Google Classroom, Miro, NewRow, Klaxoon) available to learners, so that they can collaborate and get in touch with one another for talking, planning, and brainstorming on the course topics. Type the URL of the external tool shown to learners in the event details area.
Finally, you can choose an Instructor for your event. In the search text box, start typing the name of the instructor, then choose it from the list that will appear below the search bar.
Press Confirm to confirm the event creation. To edit the event, access the event configuration area, where you will find two tabs: Properties and Attendance.
Let’s start with the Properties tab. Use the General section of this tab to review and edit the details you set when you created the event.
Move to the Details tab to configure the event instructors for the event, if different from the session instructors. If you assign an instructor to a single event within a session, they can mark the attendance for the learners attending that specific event but will have no control over the other events or over the session. In this scenario, the instructor will neither be able to upload nor manage the training material assigned to the course.
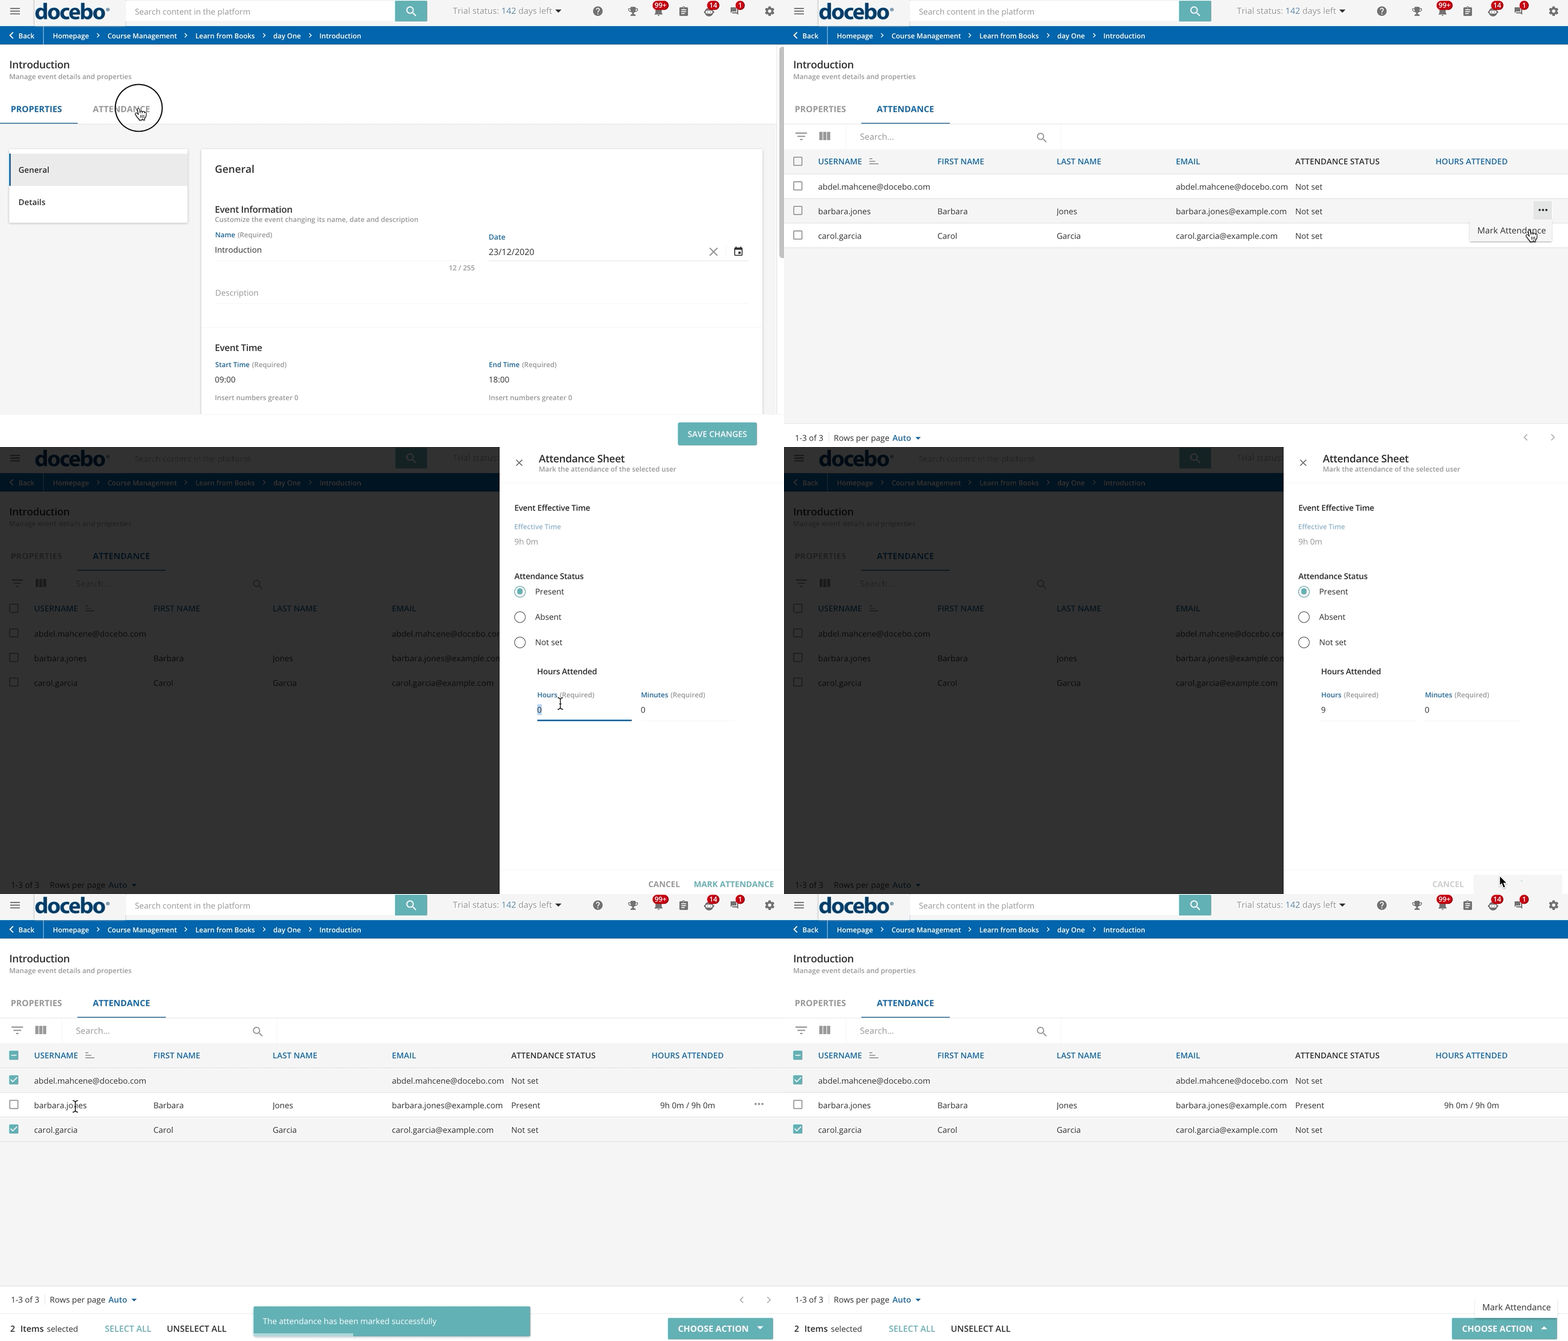
The Attendance tab shows the list of learners enrolled in the session, and thus in the event. From here you can manually mark that the learner attended the event by clicking on the ellipsis menu at the end of the user row and selecting the Mark Attendance option.
The right panel shows the attendance sheet for the selected user and you can mark whether the user has attended the event or not, together with the number of attended hours. You can mark the attendance for several users at a time by selecting them with the checkbox next to their names, clicking the Choose Action button in the bottom right corner of the table, and selecting the Mark Attendance option.
Was this article helpful?
That’s Great!
Thank you for your feedback
Sorry! We couldn't be helpful
Thank you for your feedback
Feedback sent
We appreciate your effort and will try to fix the article

