Introduction
Docebo’s New Custom Reports functionality in the New Reports menu allows you as a Superadmin or Power User to create custom reports to view and analyze specific information about courses, users, training material or apps you activated in your platform. With the new experience for custom reports, you can now create, configure, schedule and preview your report using different tabs on the same page, so you can easily come back to the settings configured to change some of them whenever you need it.
It now takes only a few minutes to export your report. Additionally, you can continue to use your platform and your device without any restrictions during the export process, because the process will run in the background.
You can discover all these new features (and many more) available in the Custom Reports Builder tab in the New Reports menu by reading Creating & Managing New Custom Reports.
We want to ensure that you know exactly what’s going on and how to best transition from the Reports menu to the feature of the new report in your learning platform. This document outlines some questions and answers that you may have about Docebo’s New Custom Reports functionality.
Important note for the transition
After the New Custom Reports functionality is released, you can create, view and manage your custom reports benefiting from the new experience and features available in the New Reports menu. The old Reports menu is still available on your platform, and you can use both of these two menus.
Migrating your reports from the old to the new menu
After the release of the New Custom Reports functionality, you may need to copy into the new menu the custom reports you previously created using the old Reports menu so that you can benefit from the new functionalities and manage your reports from the Custom Reports Builder tab in the new menu.
This is the reason why, as a temporary feature, you can migrate the reports from your old Reports menu to the New Reports menu. You will find this useful functionality for some months after the release of the experience of the new report.
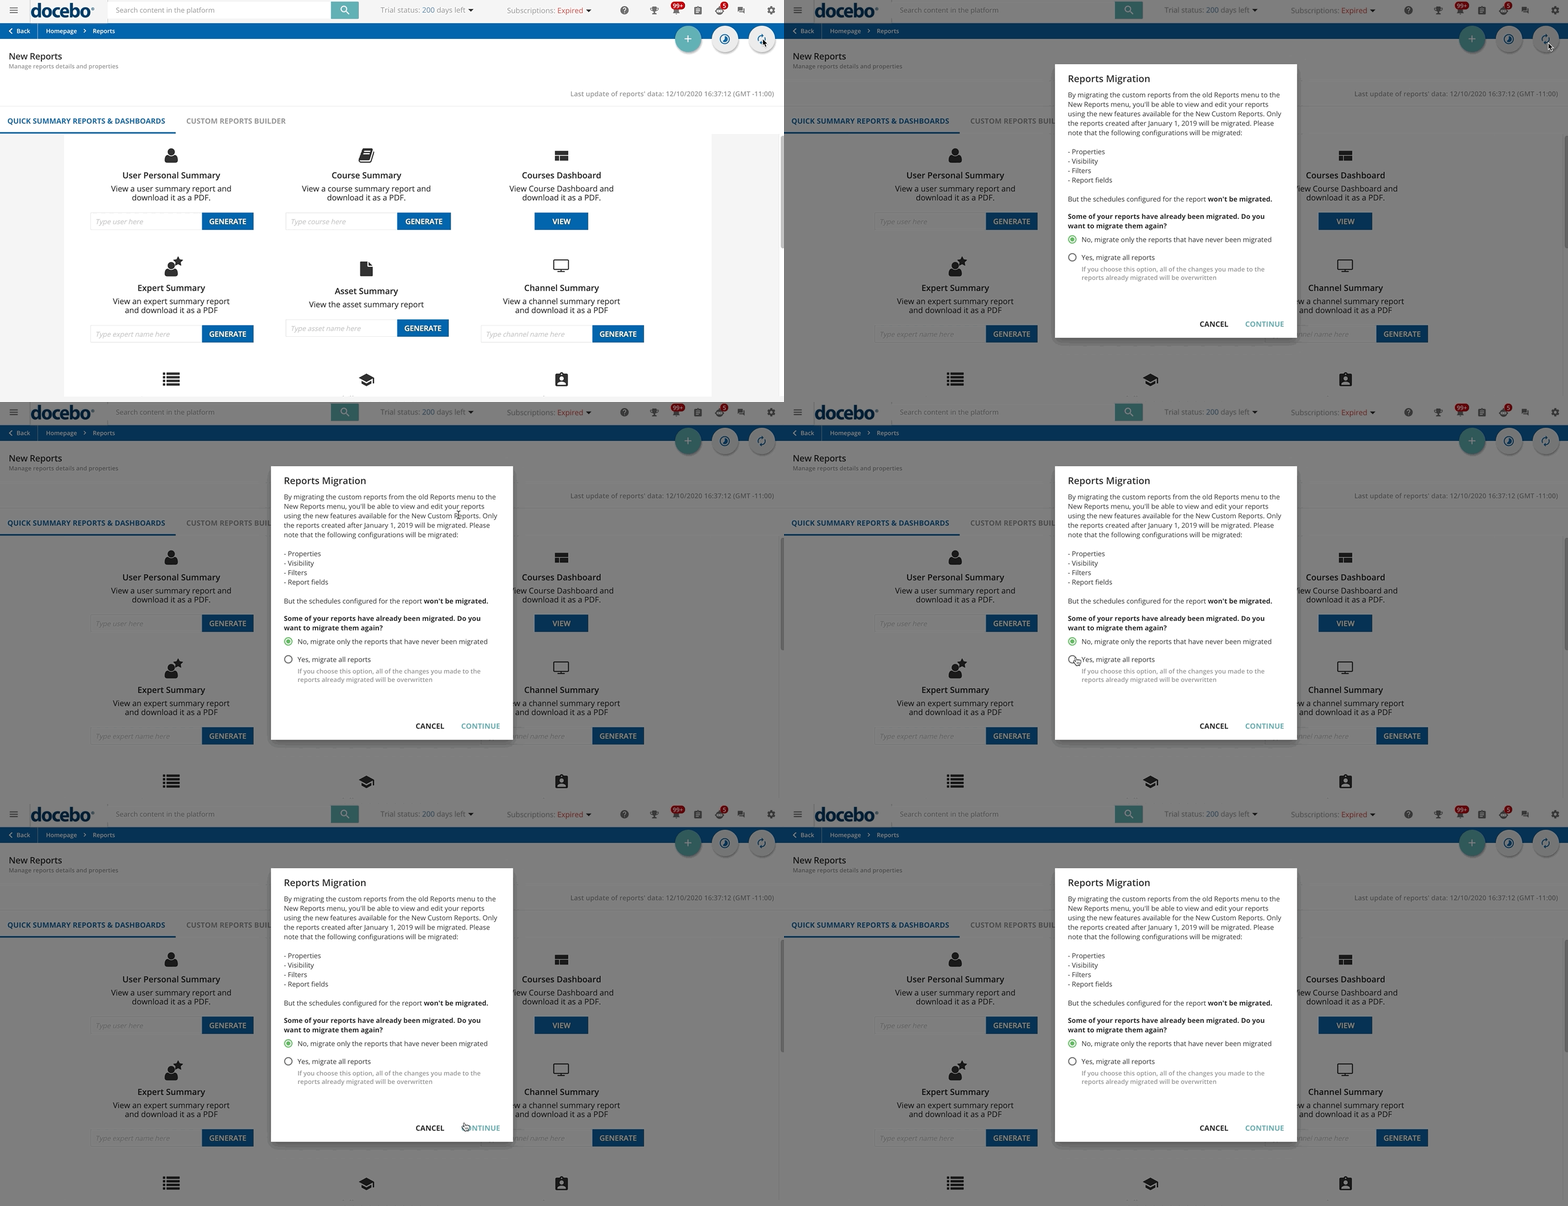
First of all, to migrate your reports, reach the New Reports page in the E-Learning section of the Admin Menu, then select the Reports Migration circular arrow icon in the top right corner of the page. In the pop-up box that opens, press the Continue button to confirm your action. All of the reports in the old menu (except for the ones with errors in their configuration and the ones that you created before January 1, 2019) will be migrated to the new menu. The configurations of properties, visibility, filters and report fields will be migrated, while the schedules configured for the report won't be migrated.
You can run the migration uniquely from the New Reports menu. If you are in the old Reports menu, a warning message informs you that the reports migration functionality is now available and that you need to reach the new menu to perform this operation. You can simply click on the Go to New Custom Reports button in the warning bar to open the menu and start the migration.
If you have already migrated some of your reports when you press the Reports Migration icon to run another migration, you are warned that some of your reports have already been migrated, and you can decide if you want to migrate only the reports that have never been migrated or to migrate all the reports (including those that have already been migrated) by selecting the corresponding option. Then, press Continue to confirm your action.
Keep in mind that, if you migrate a report that you created in the old Reports menu and then you make some changes to the migrated report in the new Reports menu, when you migrate again the report from the old to the new menu, and you select the option to migrate all reports, all of the changes that you made to the report already migrated will be overwritten, and thus lost. Also remember that, if you migrate a report that you created in the old Reports menu and then you make some changes to this report in the old Reports menu, of course you won’t find in the new menu the changes you made after the migration. To see your updates in the new menu, you need to migrate your reports again.
The reports migration operation will only take a few minutes to complete. When it is complete, a pop-up window will appear, informing you about the number of custom reports that have been migrated successfully and, if any, about the reports which could not be migrated. In the latter case, you can download the error log to see what went wrong.
Was this article helpful?
That’s Great!
Thank you for your feedback
Sorry! We couldn't be helpful
Thank you for your feedback
Feedback sent
We appreciate your effort and will try to fix the article
