Creating a Branch in your Organizational Chart
In order to create an organization chart, log into your platform as the Superadmin. Then, access the Admin Menu by scrolling your mouse over the gear icon in the top right corner. In the Admin Menu, find the E-Learning section, then press the Users item.
On the main All Users page, you can organize your users into different folders, in a unique order or hierarchically. Every user that you create is placed within a branch. This is essential to the organization and creation of different folders per office, agency, division, unit, country, etc. Newly created users will always be placed in your root branch unless you specify a specific branch or sub-branch in which to place them during the creation process.
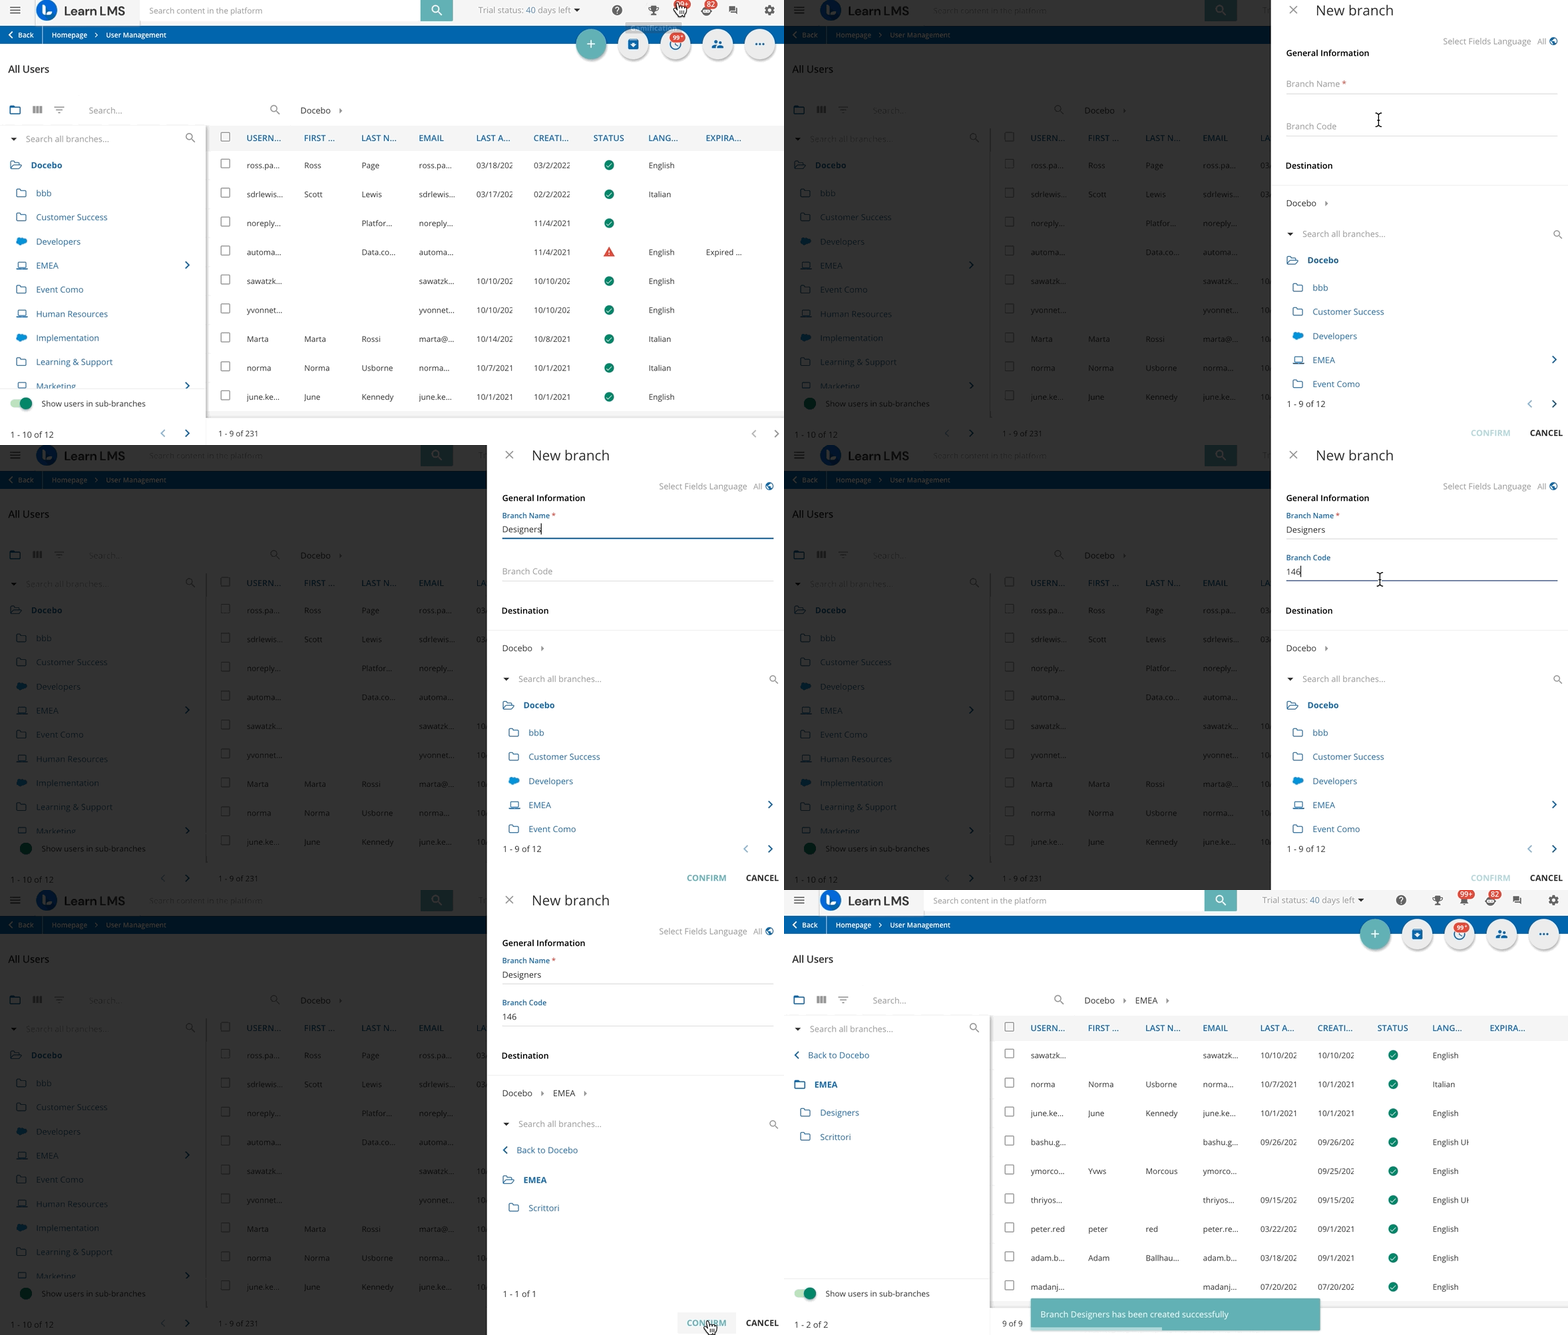
To add a new branch (folder), press the plus button in the top right corner of the page, then press the New Branch item. In the slideout panel, give the branch a name and code. Please note that if the folder has been set in a specific language that is not the default language on the platform, the folder name is still shown in the platform's default language. Remember, the code you assign will be the same for each language. The code is an alphanumeric value different from zero and is not a required field. If you do not assign a code to a branch, it will not be visible and available for selection in the platform registration form.

Now, in the Destination section of the panel, decide where to place the folder. If you want this new branch to be a folder within the root branch, select the root branch (the folder at the top of the list). Alternatively, if you want the new branch to be a sub-folder (sub-branch), select a folder from the list in which you want to place this new sub-branch. When finished, press Confirm.
Was this article helpful?
That’s Great!
Thank you for your feedback
Sorry! We couldn't be helpful
Thank you for your feedback
Feedback sent
We appreciate your effort and will try to fix the article