Creating a Power User Profile
A profile is a set of permissions that you can associate with one or more Power Users. You can configure as many profiles as you need in your platform, but remember that you can assign up to 10 profiles to each Power User.
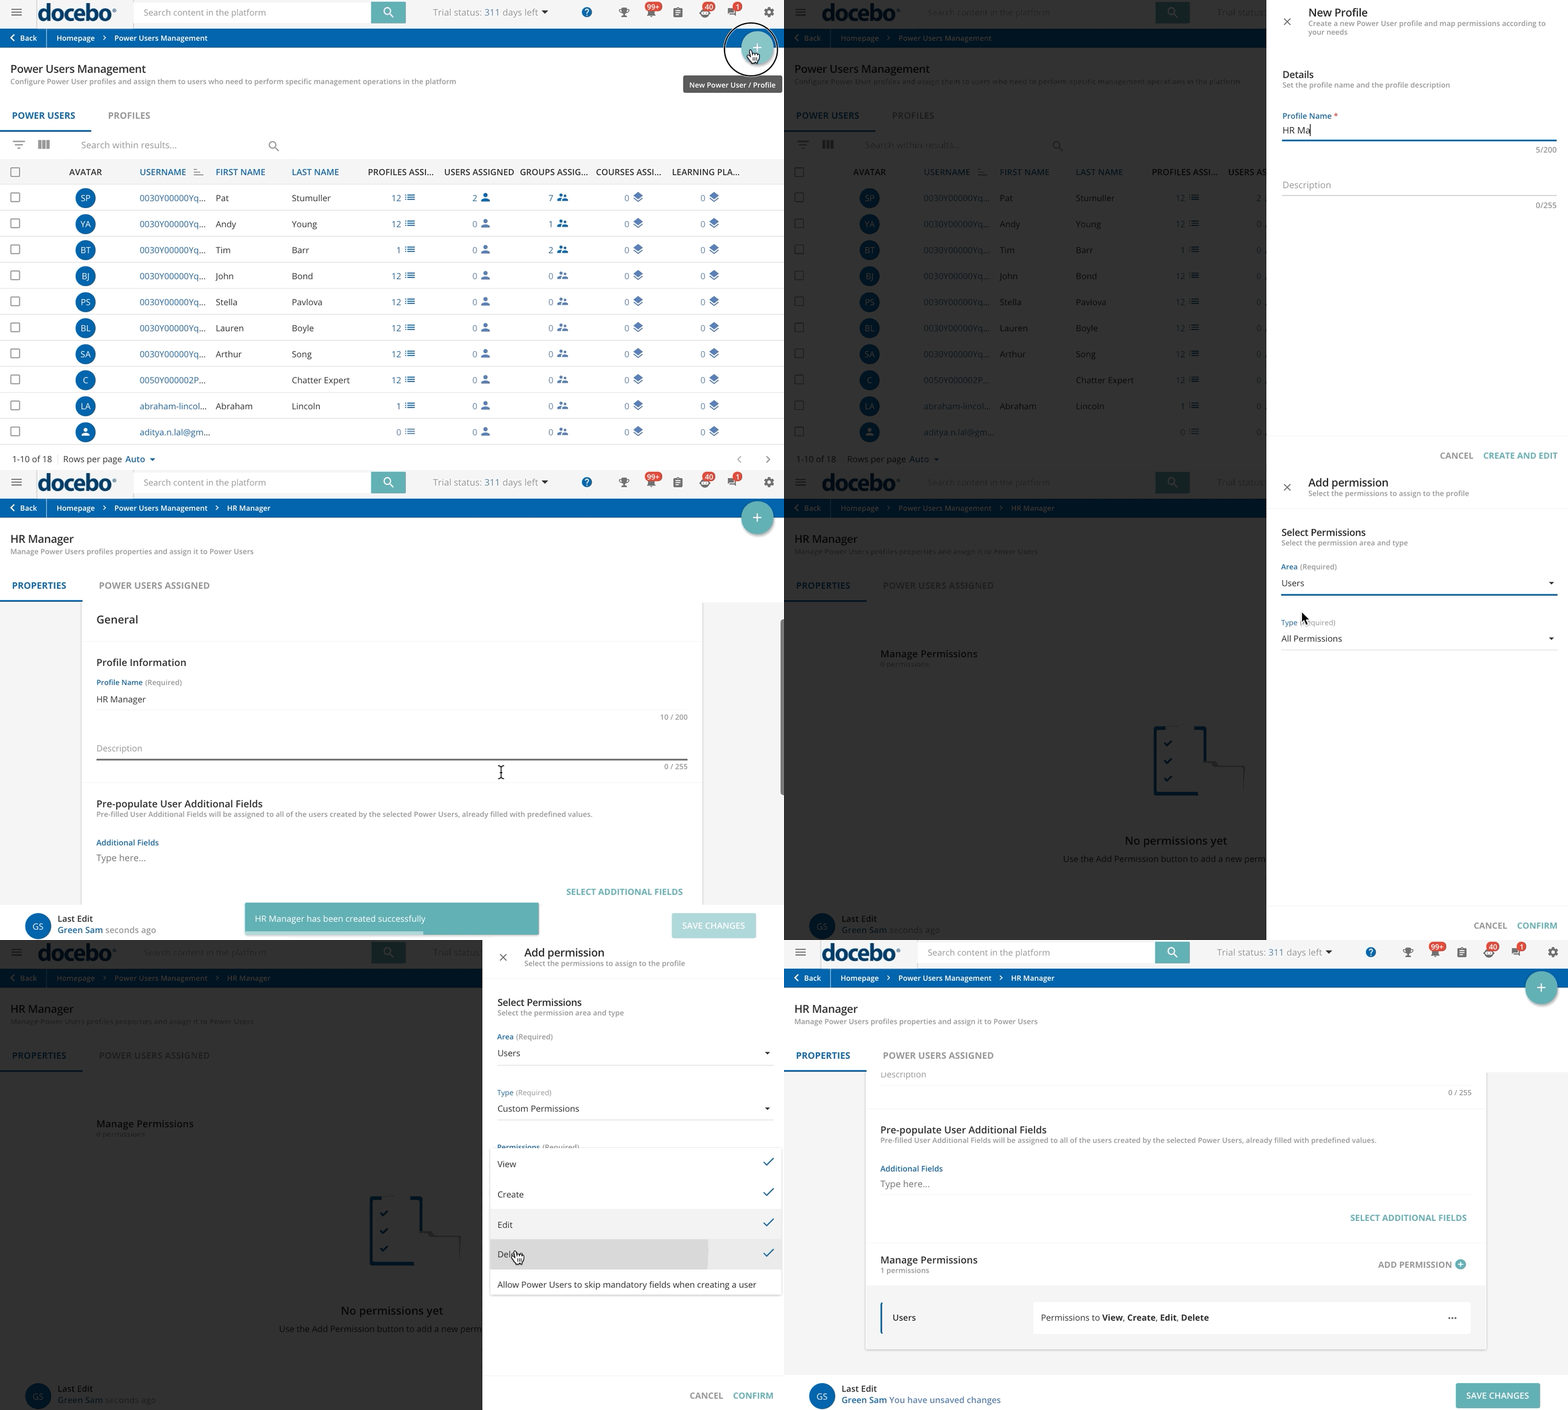
In order to create a new Power User profile, from the main Power Users Management page, click on the plus button in the top right corner, then select New Profile. In the right panel, set a profile name and, optionally, a profile description. For security reasons, both the profile name and the profile description are checked according to the OWASP guidelines (opens in a new tab) and will be sanitized to avoid injections. Click on Create and Edit to start the configuration.
Use the General section to edit the profile name and description, if necessary. Please note that the following characters < > \ | / = + are not accepted in the profile name field, and you will not be allowed to save the changes related to the profile when the name includes those characters.
Use the Pre-Populate User Additional Fields area to select the user additional fields that will be automatically populated with the data of the Power Users associated with the profile when they create new users. To do so, click on Select Additional Fields, select one or more fields from the right panel that will open by clicking the checkboxes next to their field names, and click on Select to confirm your action. This step is optional. Please note that the user additional fields defined as Invisible to the user are not automatically populated upon the user creation.
Move now to the Manage Permissions section to assign the rights to the profile, that is what the Power Users assigned to the profile will be authorized to do in your platform. Click Add Permission, and select an area from the corresponding dropdown, in the right panel that will open. Once you pick up an area, use the Type dropdown to define whether you want to assign all permissions related to the selected area to the Power User profile, or select the Custom Permissions option to choose a subset of permissions from the third dropdown.

Please note! Have a look at the complete list of the permissions available for the configuration of Power User profiles to have an overview of the available permissions and relevant options.
Once you have completed your selection, click Confirm. The permission you have added is listed in the recap bottom area of the Manage Permissions section. Repeat the permission selection for all of the areas you wish to assign to the profile.
Was this article helpful?
That’s Great!
Thank you for your feedback
Sorry! We couldn't be helpful
Thank you for your feedback
Feedback sent
We appreciate your effort and will try to fix the article