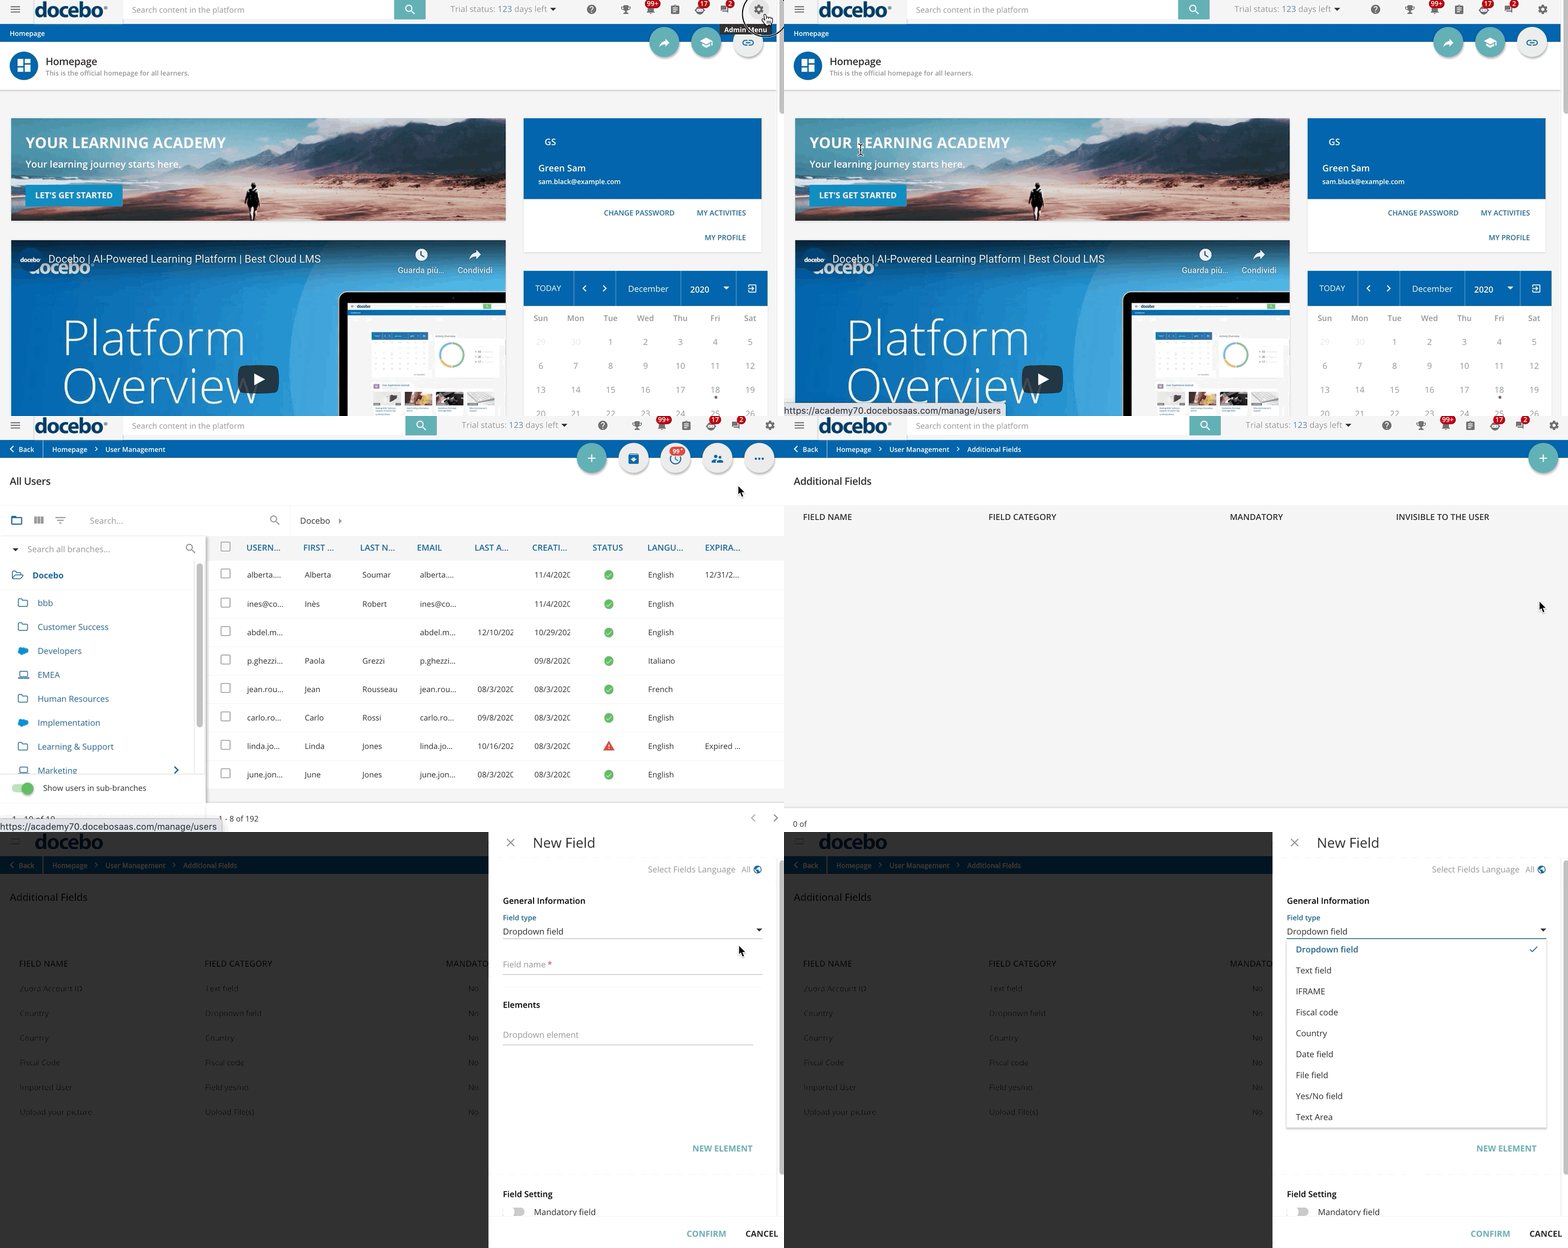
Creating a User Additional Field
In order to create additional fields for users, log into your platform as the Superadmin. Access the Admin Menu by scrolling your mouse over the gear icon in the header. In the E-Learning Section, press the Users item. Press the ellipsis button in the upper right corner of the page, then press the Additional Fields button that appears. On the next page, press the Plus button.
In the slide-out panel, select the field language at the top by pressing the globe icon, then select your preferred language from the list. Next, select the field type from the Field Type dropdown menu: fiscal code, country (with a pre-defined list of countries), date (provides a calendar), dropdown field (up to 300 or 500 elements per dropdown, depending on your plan), free text field, upload file field, Iframe, or yes/no field.
Add a field name to the corresponding text field. For the dropdown field type, insert all of the dropdown elements into the corresponding text field, pressing the New Element button after each individual element, in order to add it to the dropdown menu.
Finally, manage the field settings:
- Mandatory Field. This field will be a mandatory field for a user profile. When this option is flagged, the user must fill in this field upon his or her next login to the platform. This option is not available when the selected additional field is Iframe.
- Invisible to the User. This field will not be visible to the user when he or she views his or her own profile. Please note that this field would be invisible to Power Users as well, even if they have permission to edit the user's profile. The field will only be visible to Superadmins.
When you're finished, press Confirm.
Please note that it is possible to create up to 50 user additional fields in your platform.
Was this article helpful?
That’s Great!
Thank you for your feedback
Sorry! We couldn't be helpful
Thank you for your feedback
Feedback sent
We appreciate your effort and will try to fix the article
