Managing User Additional Fields
Once an additional field is created, find it in the list of all additional fields. When you hover your mouse over the field's row, the edit and delete icons will appear at the end of the row. Use the search bar at the top to search for specific fields.
You can also organize the order of these additional fields by dragging and dropping the additional field row in the list. The order will be reflected in the Additional Fields tab of the User Management panel when the user is created or edited, and in the self-registration procedure.
If an additional field was added after creating or importing your users, the field will automatically be assigned to the master data file present in the platform. However, in order to update this content, you need to import a new CSV data file for the new field, or you must create a request that prompts users to fill out the new field (if marked as required).
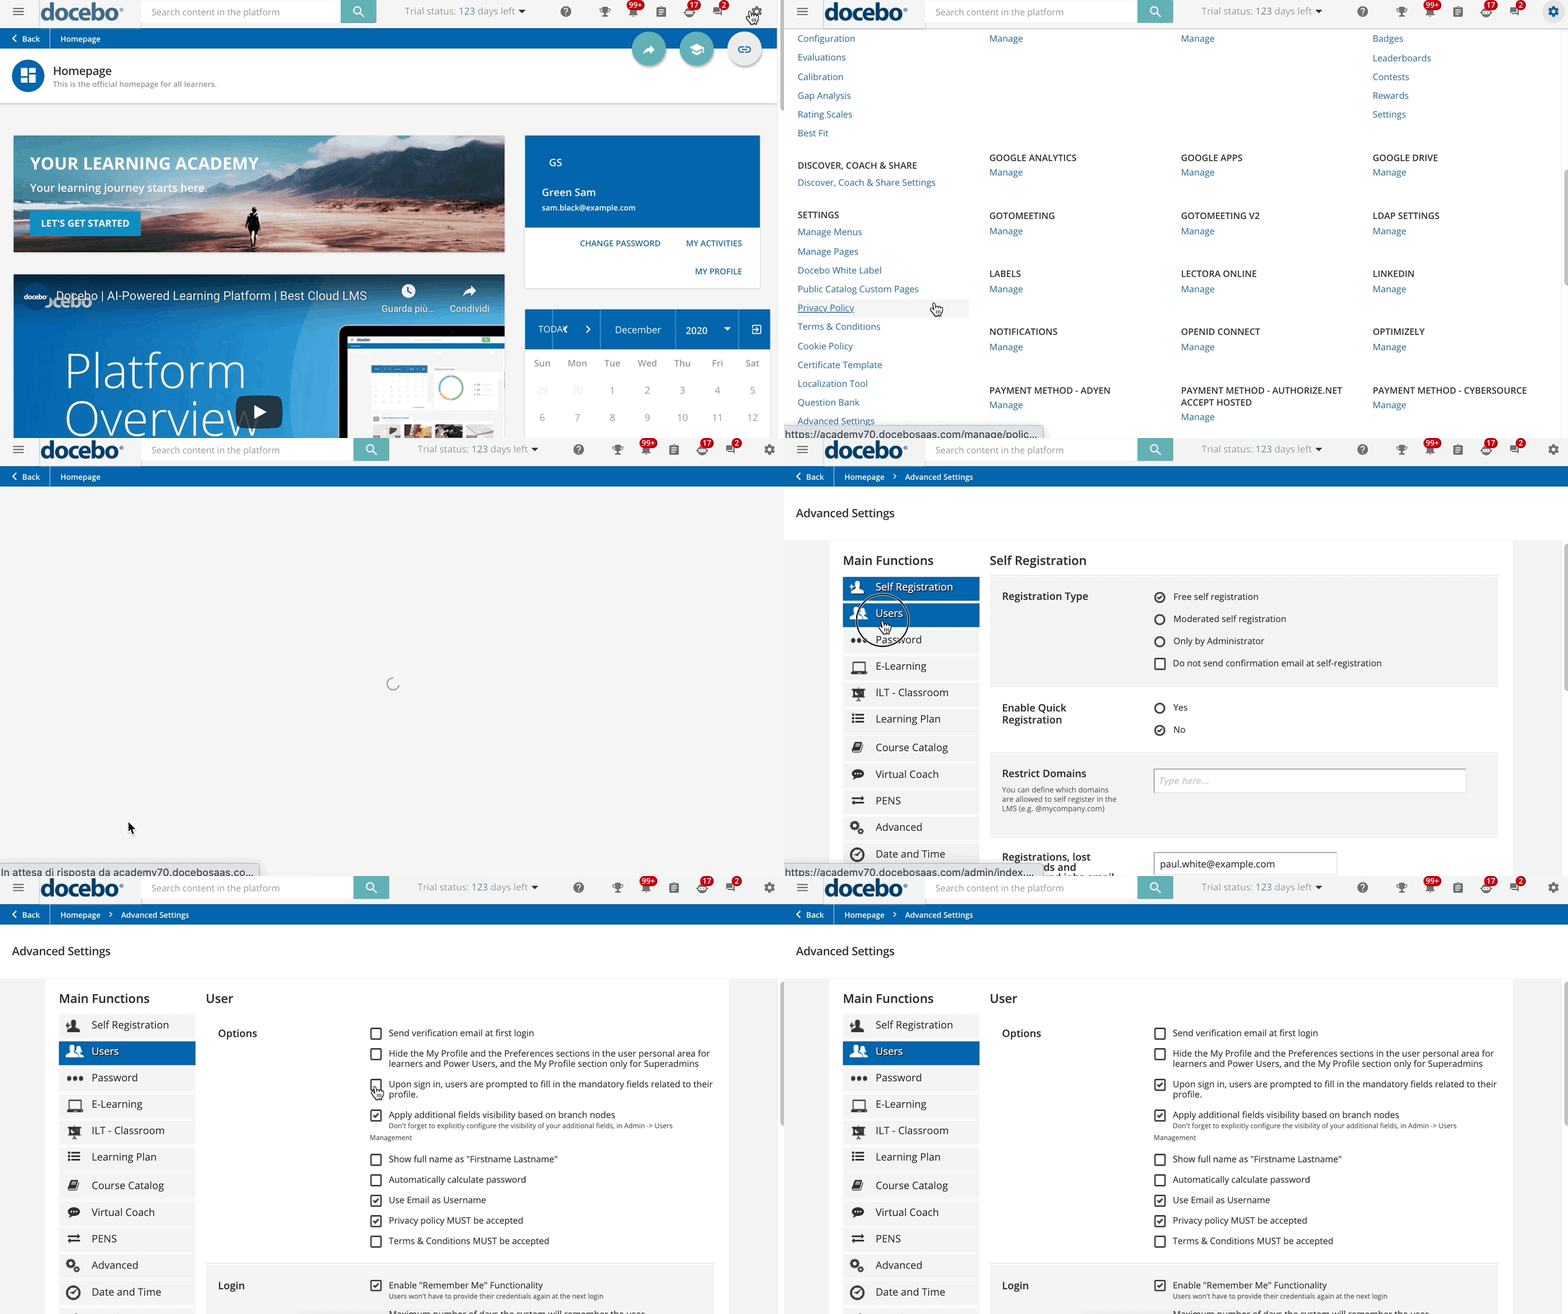
You can do so from the Advanced Settings menu (Admin Menu, Advanced Settings, Users tab). In this tab, flag the At the sign in the user is prompted to fill in the mandatory fields related to his profile option.
Please note that if your platform integrates with Salesforce, all users will be associated with the sfdc_user_type and the sfdc_id additional fields, even before running the first synchronization. These additional fields can neither be edited nor removed since they are used to handle the synchronization process between the two systems.
Remember that user additional fields are also available as tags in the configuration of certificate templates.
Was this article helpful?
That’s Great!
Thank you for your feedback
Sorry! We couldn't be helpful
Thank you for your feedback
Feedback sent
We appreciate your effort and will try to fix the article
