Creating a Classroom
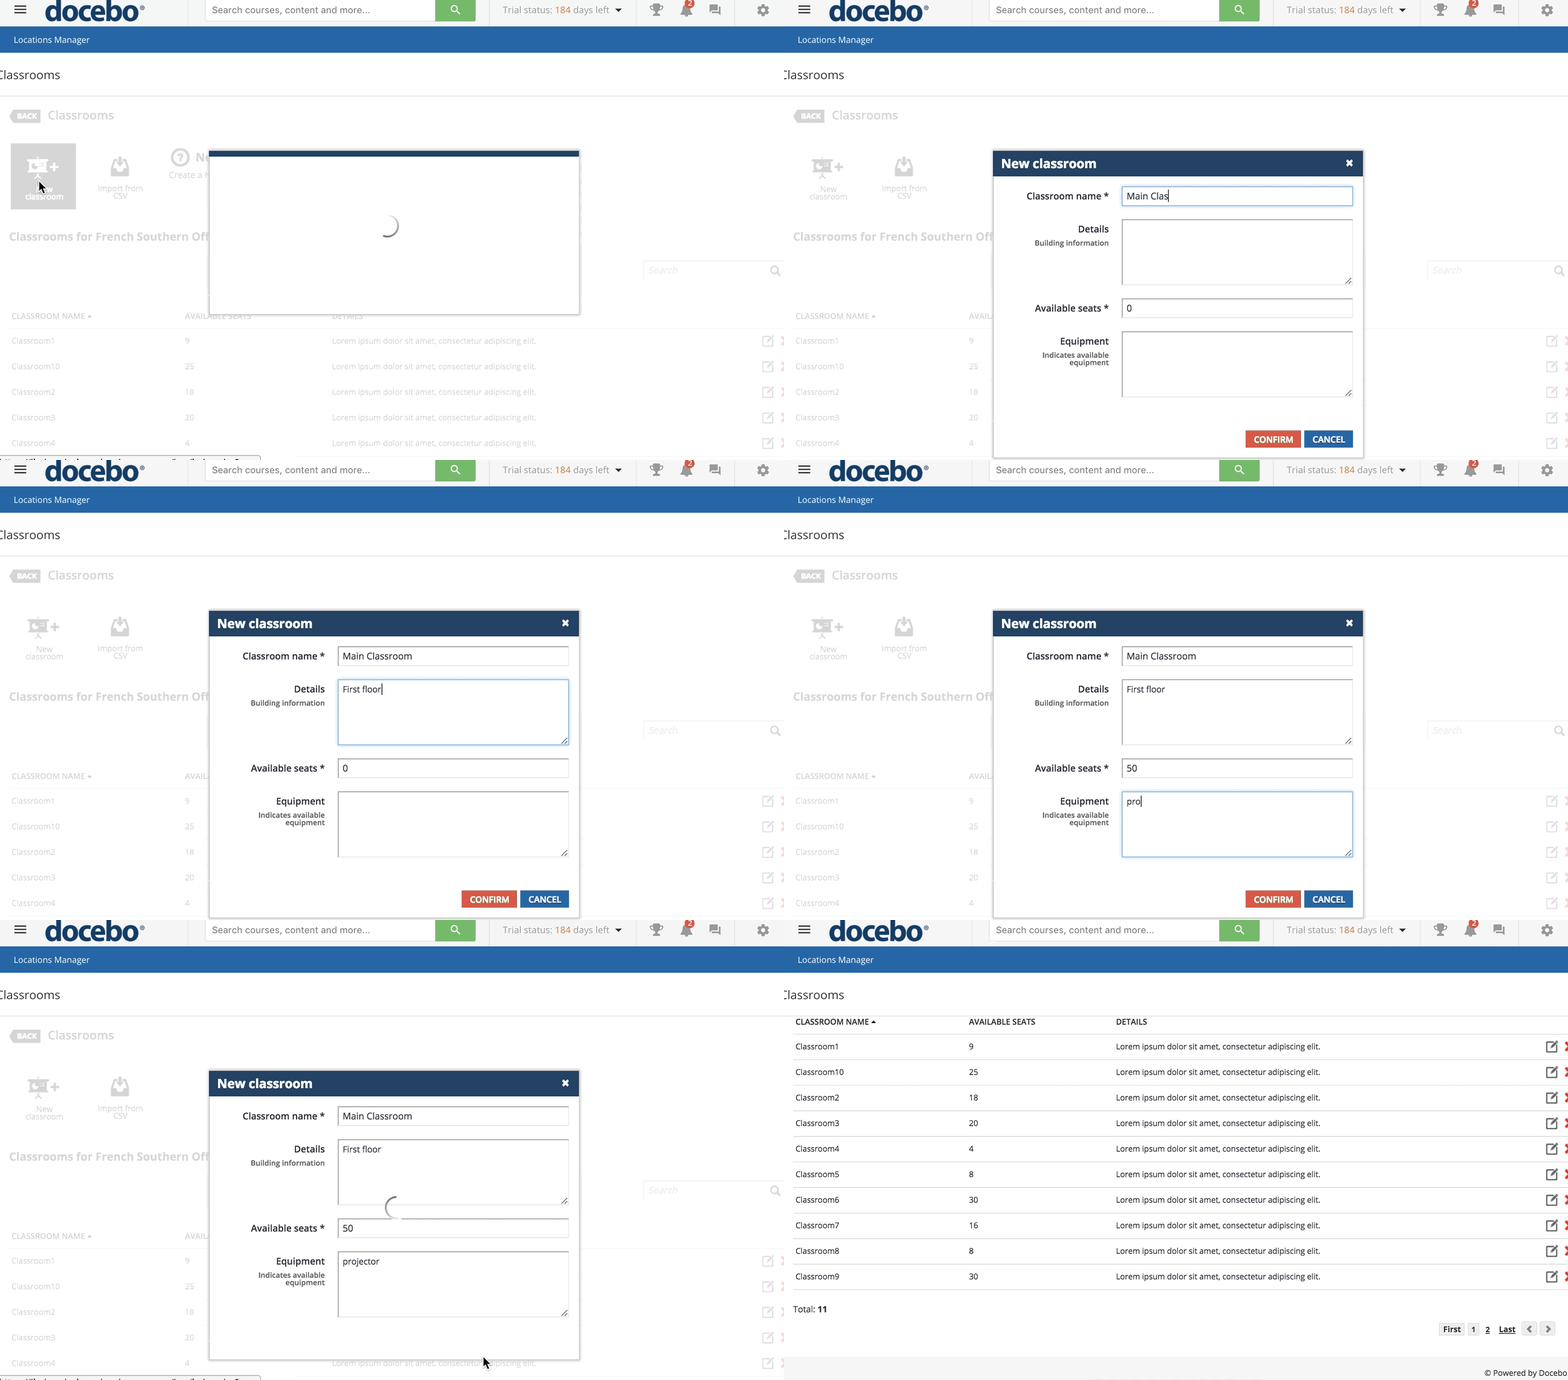
Once the new location has been created, you can start adding new classrooms. Select the Add Classroom(s) item in the location’s row. You will then be redirected to the classrooms page for the specific site. At the top of the page, press the New Classroom button to add a new classroom.
In the pop-up box, add the classroom name, details, available seats, and equipment into the corresponding text fields. Please note that the classroom name and the number of available seats are mandatory to complete.
When you’re finished, press Confirm. The classroom will now appear in the list of classrooms, and you can edit or delete it as necessary. You can add as many classrooms as needed to the same location. You can also import a set of classrooms via a .csv file. To do so, select the Import from CSV file button in the action bar at the top of the classrooms page.
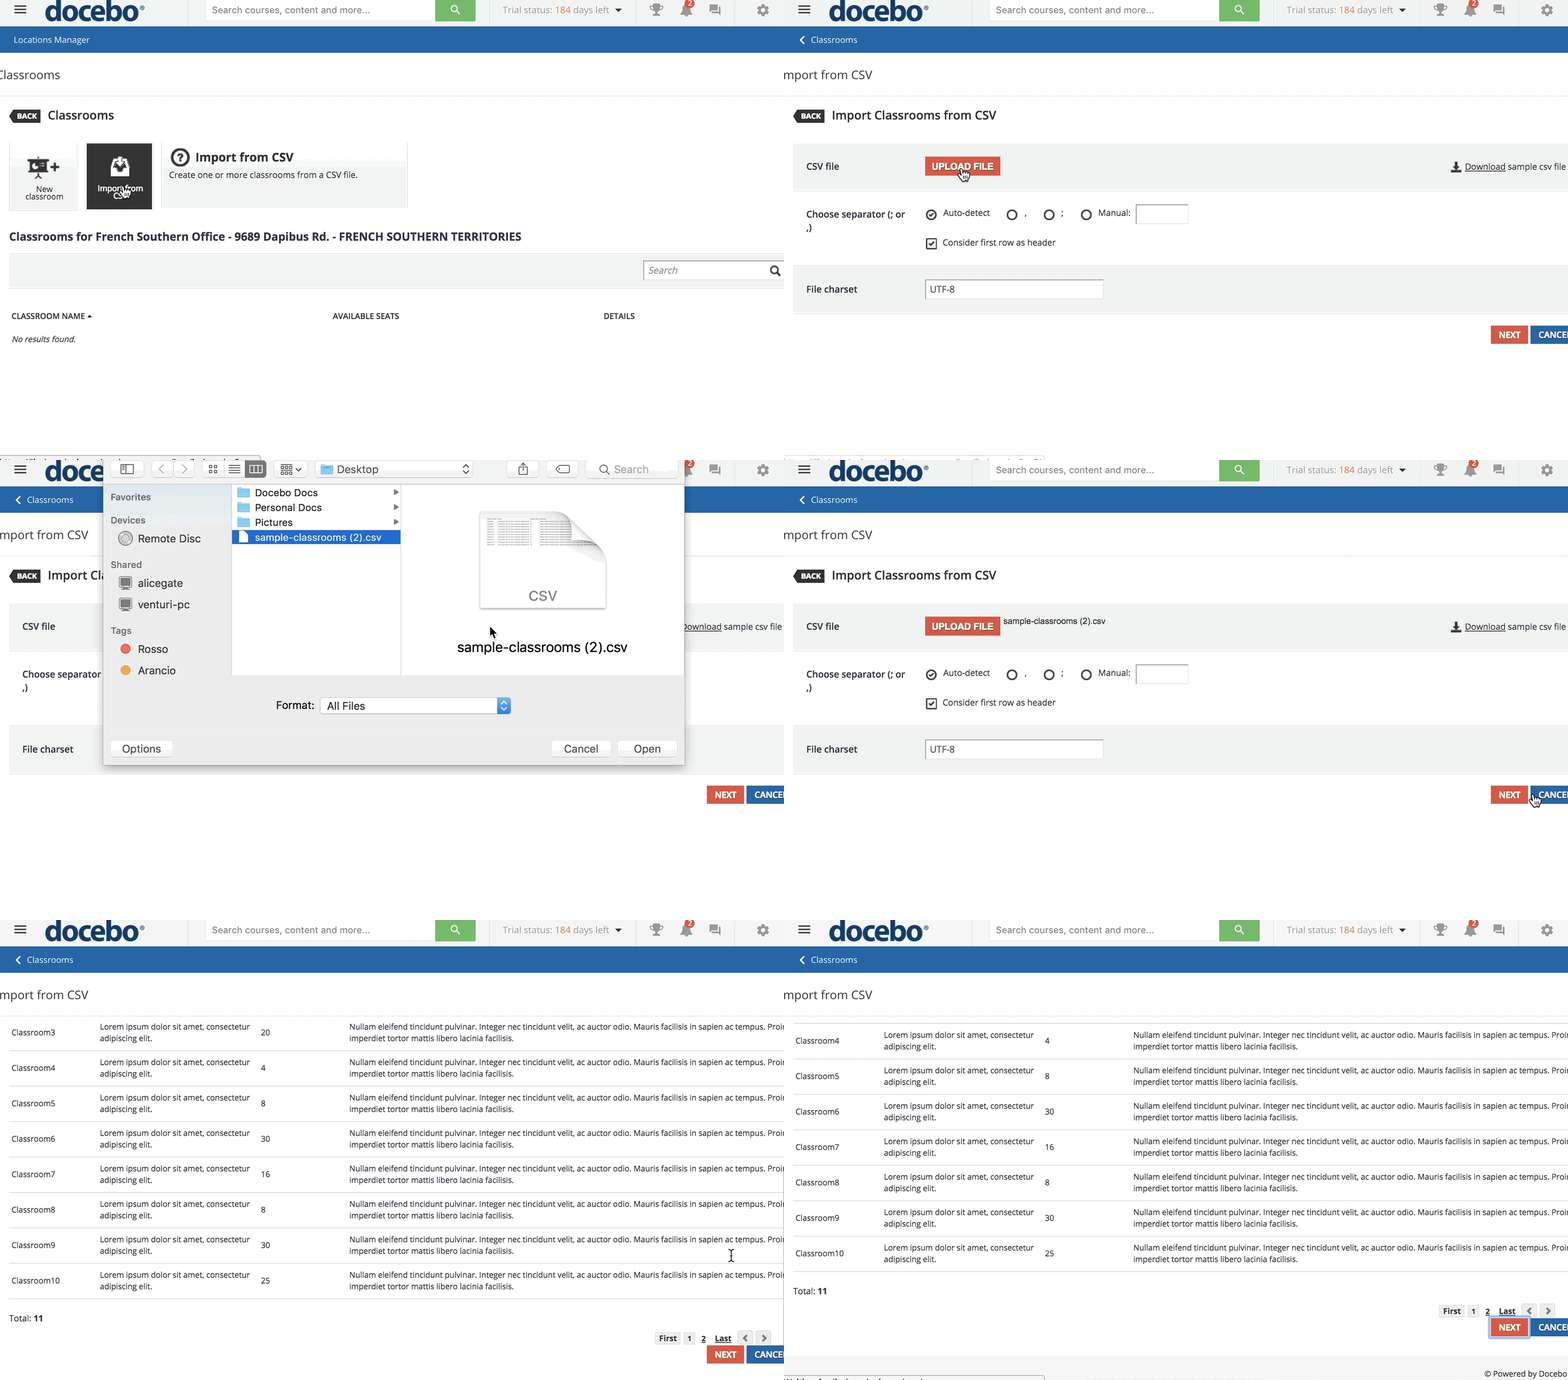
You need to insert the following columns into your .csv file: classroom name, details, available seats, and equipment. You can download a sample of the .csv file via the related link, as shown in the picture below.
When you’re ready, select the Upload File button and choose your file. Select the separator and file charset, then press Next.
Once uploaded, you can go ahead with the association of each column to the related field. Then select the Next button. The system will give you feedback regarding changes that you may need to make, if necessary. Once classrooms are successfully uploaded, they will appear in the list of classrooms for the location.
Was this article helpful?
That’s Great!
Thank you for your feedback
Sorry! We couldn't be helpful
Thank you for your feedback
Feedback sent
We appreciate your effort and will try to fix the article

